LVL 5
To really digest what you"ve learned in these chapters, you need a good challenge.
So, we’re going to build a variety of Easter eggs!
Reference
Before diving into any project, it’s always a good idea to have a clear understanding of your end goal. That’s why artists usually keep a few references close by when working on their models.
Download the reference below, then put it into your scene by dragging it straight from your file folder right into the Blender viewport.
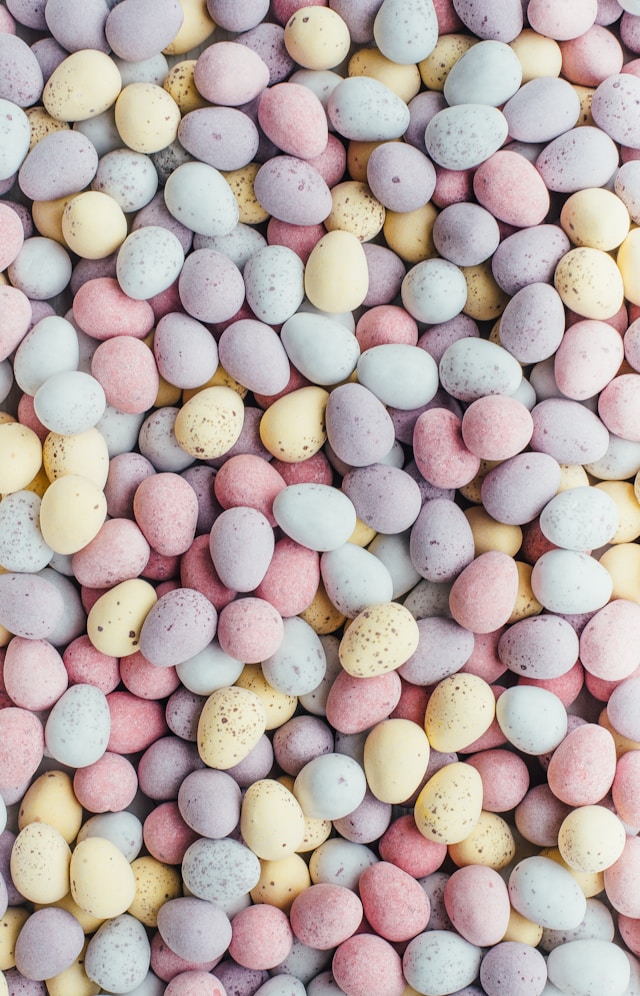
Photo by Annie Spratt on Unsplash
It should look something like this:
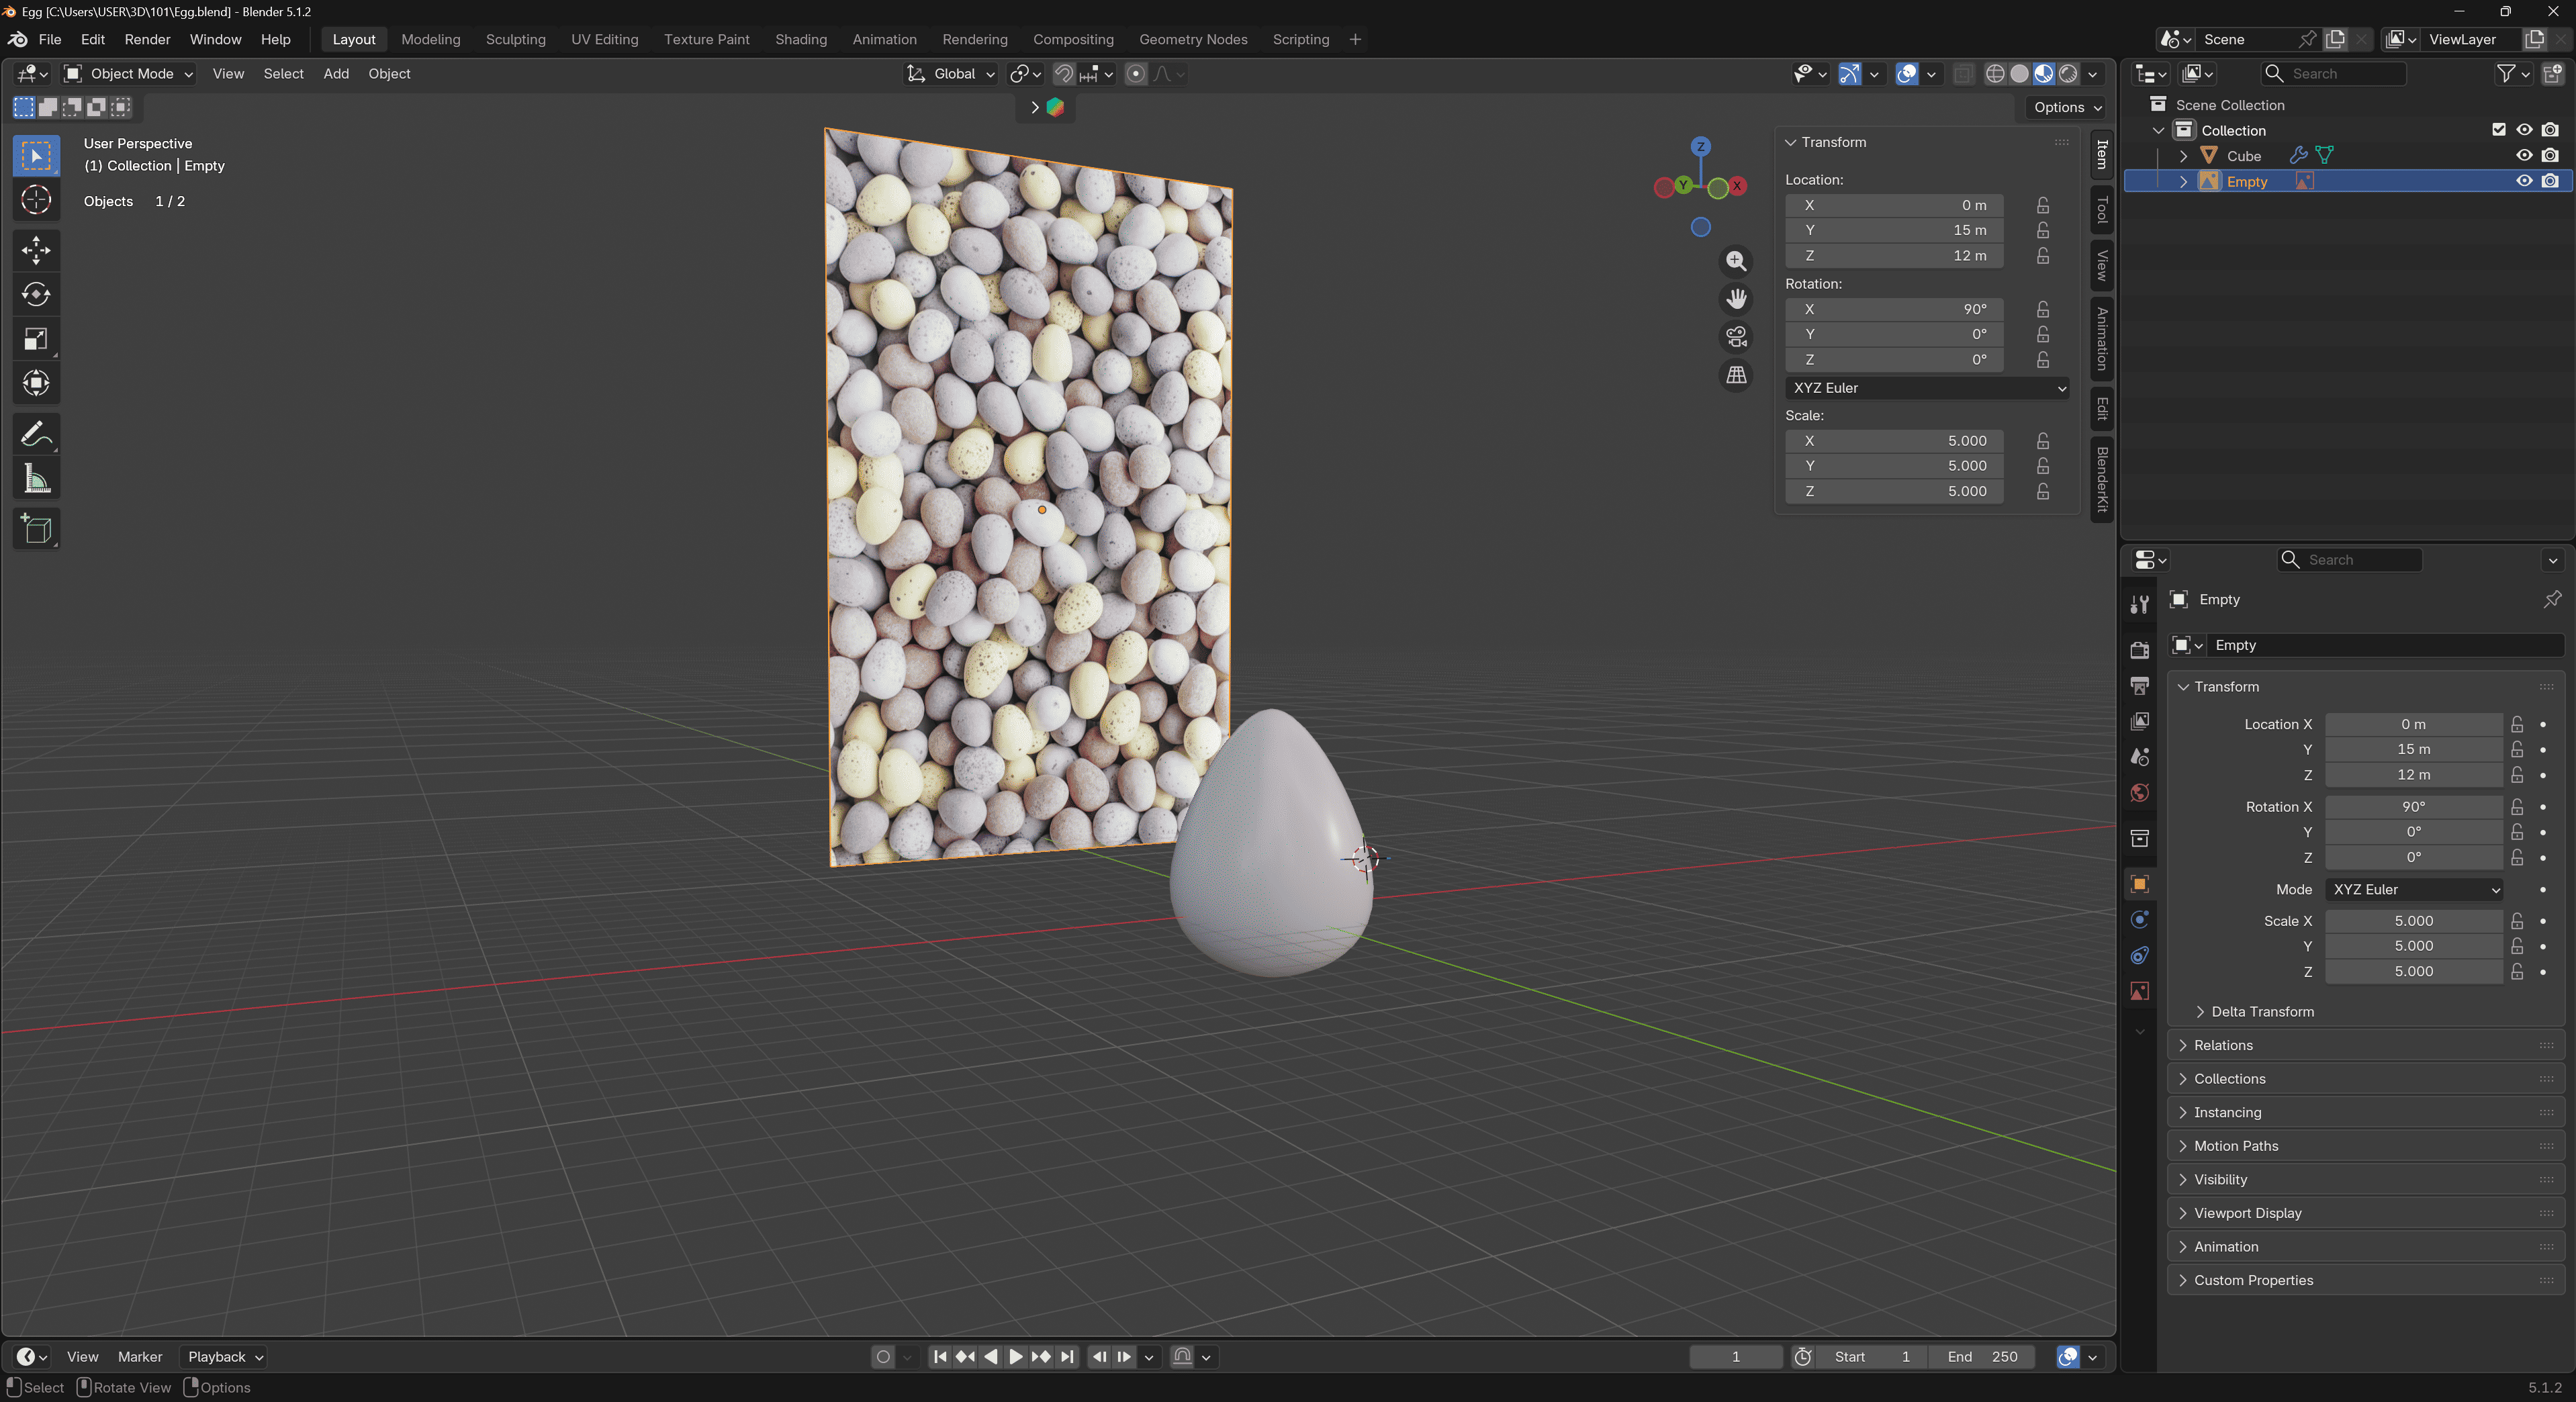
Egg -> Collection of eggs
To get one step closer to the final look, we need to create a master set of all the possible variations. Looking at our reference, there are four different eggs: red, blue, yellow, and purple.
 +
+ Duplicate the original egg
 +
+ Move the copy along X axis+Duplicate the original egg+
 +Move the copy along X axis+Duplicate the original egg
 +Move the copy along Y axis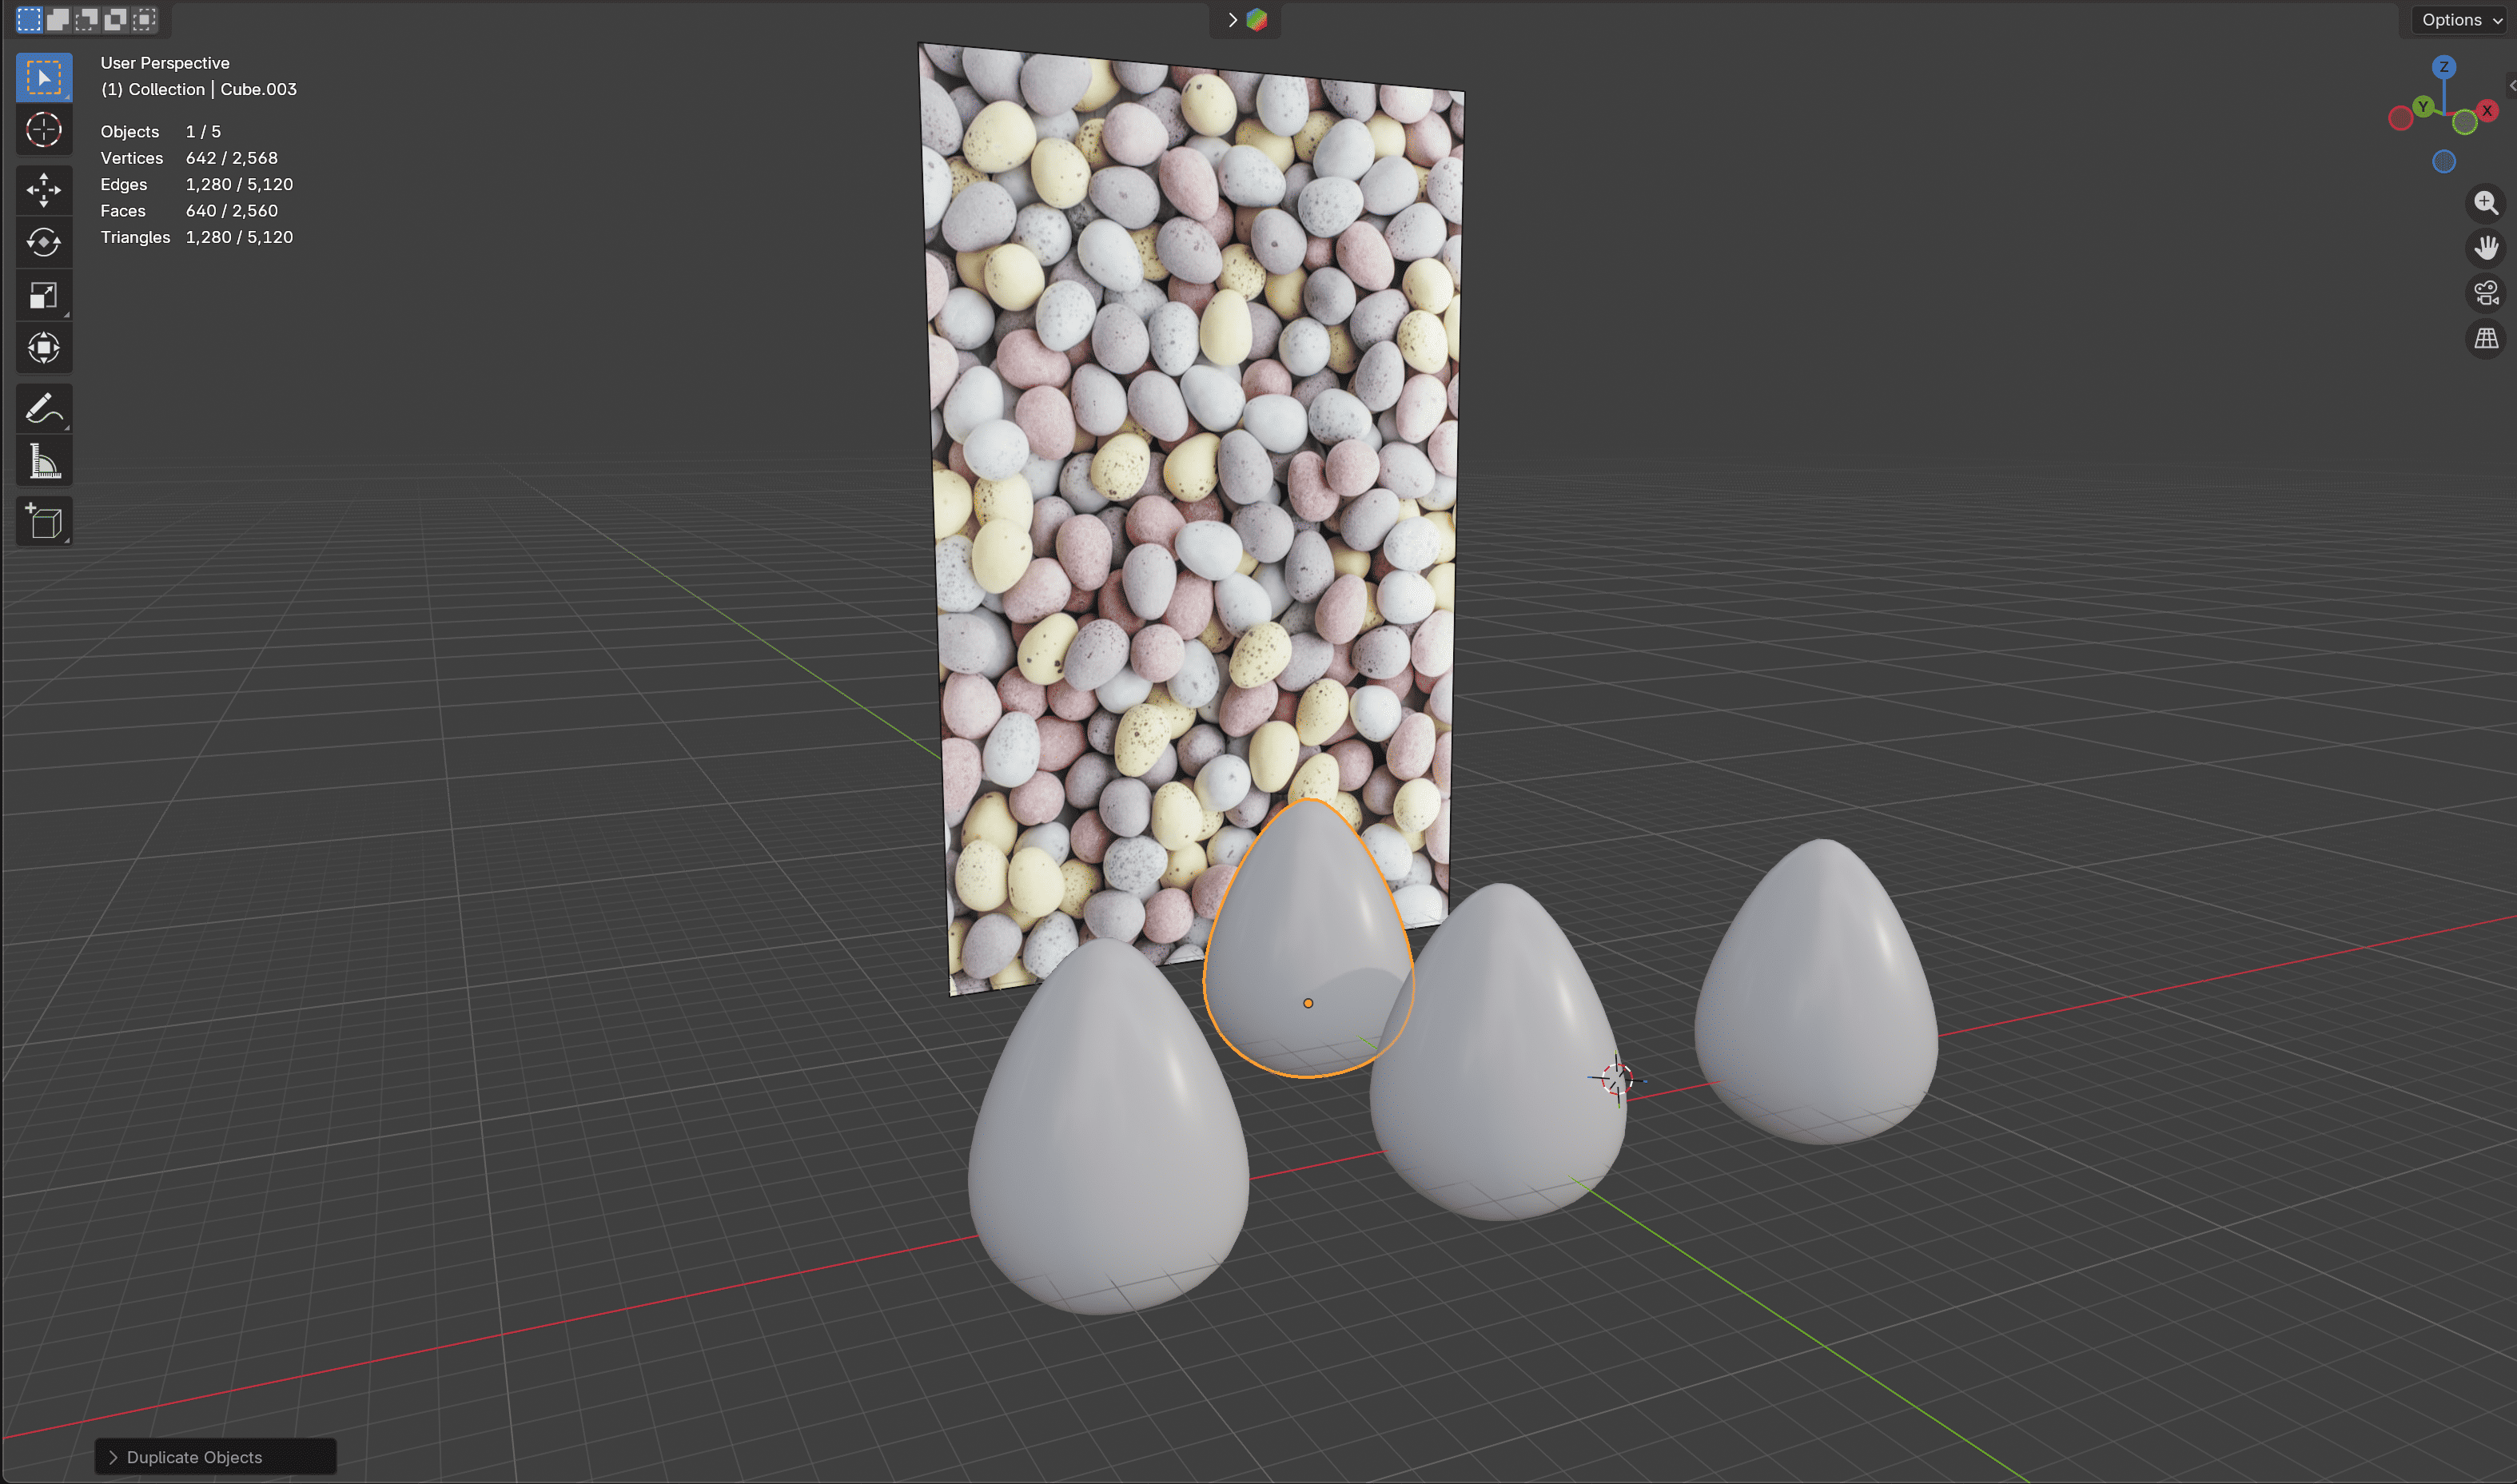
Easter Paint
Now that we have enough eggs, we can color them to match the reference! Let's head over to the Shading Tab and switch that default white material to red.
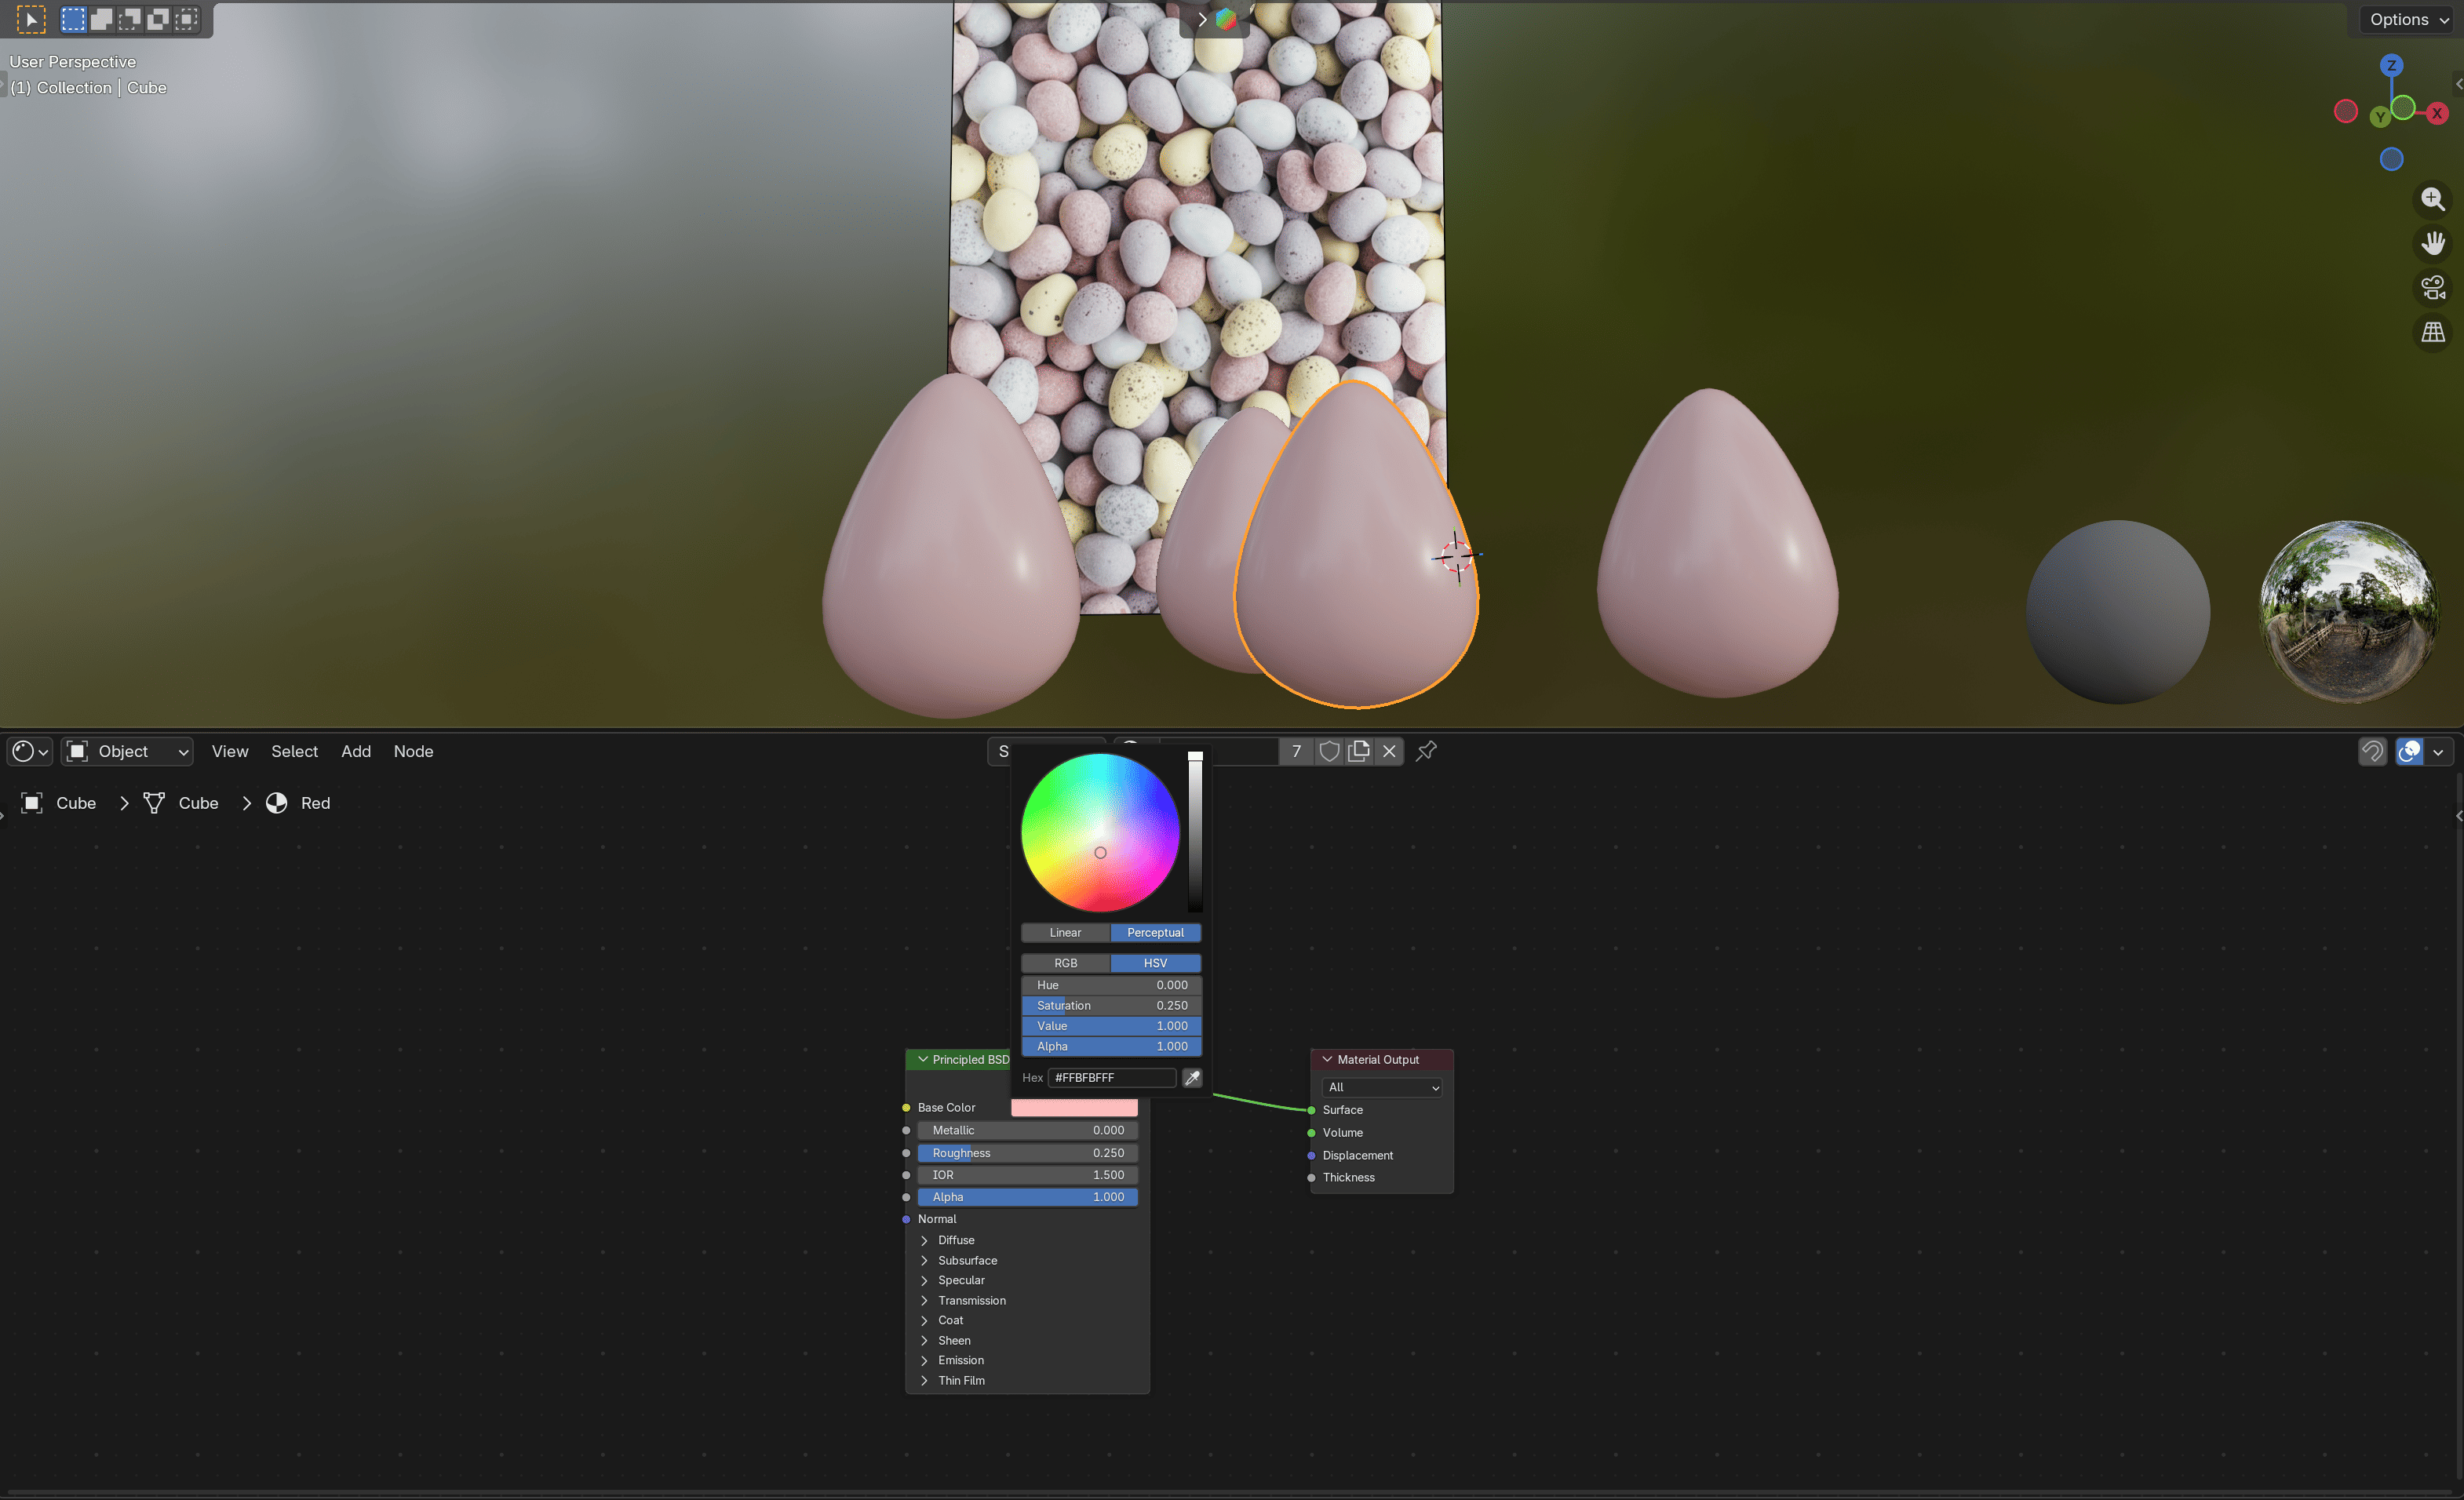
A full red color with low saturation is the sweet spot for the Easter egg
Wait, why did they all turn red?
Since they all share the exact same default material, any changes you make in the material graph will instantly apply to every single egg.
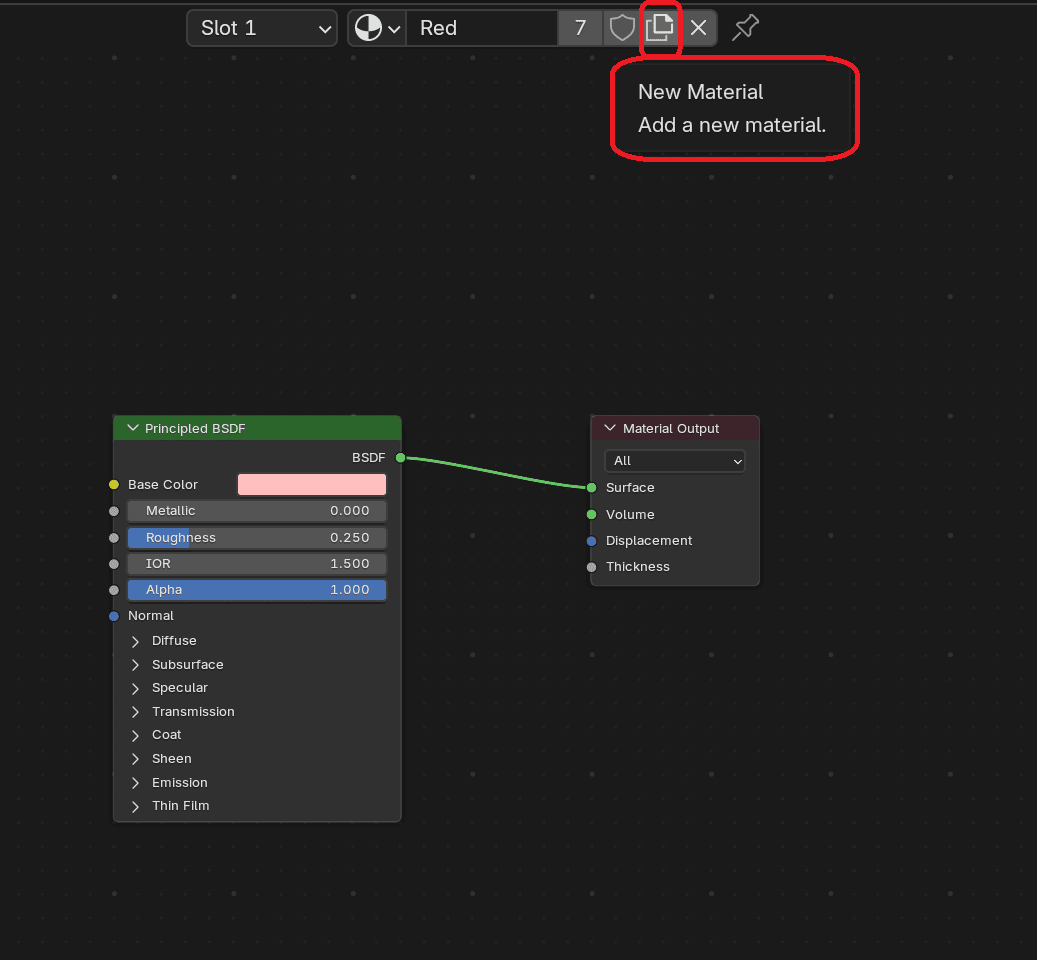
To fix this, we"re going to need three more materials. Hit the New Material button and assign a new color.
I"ve gone with blue here. Notice that I’m keeping the exact same saturation for all the colors and only tweaking the hue — this keeps the style consistent across all the egg variations.
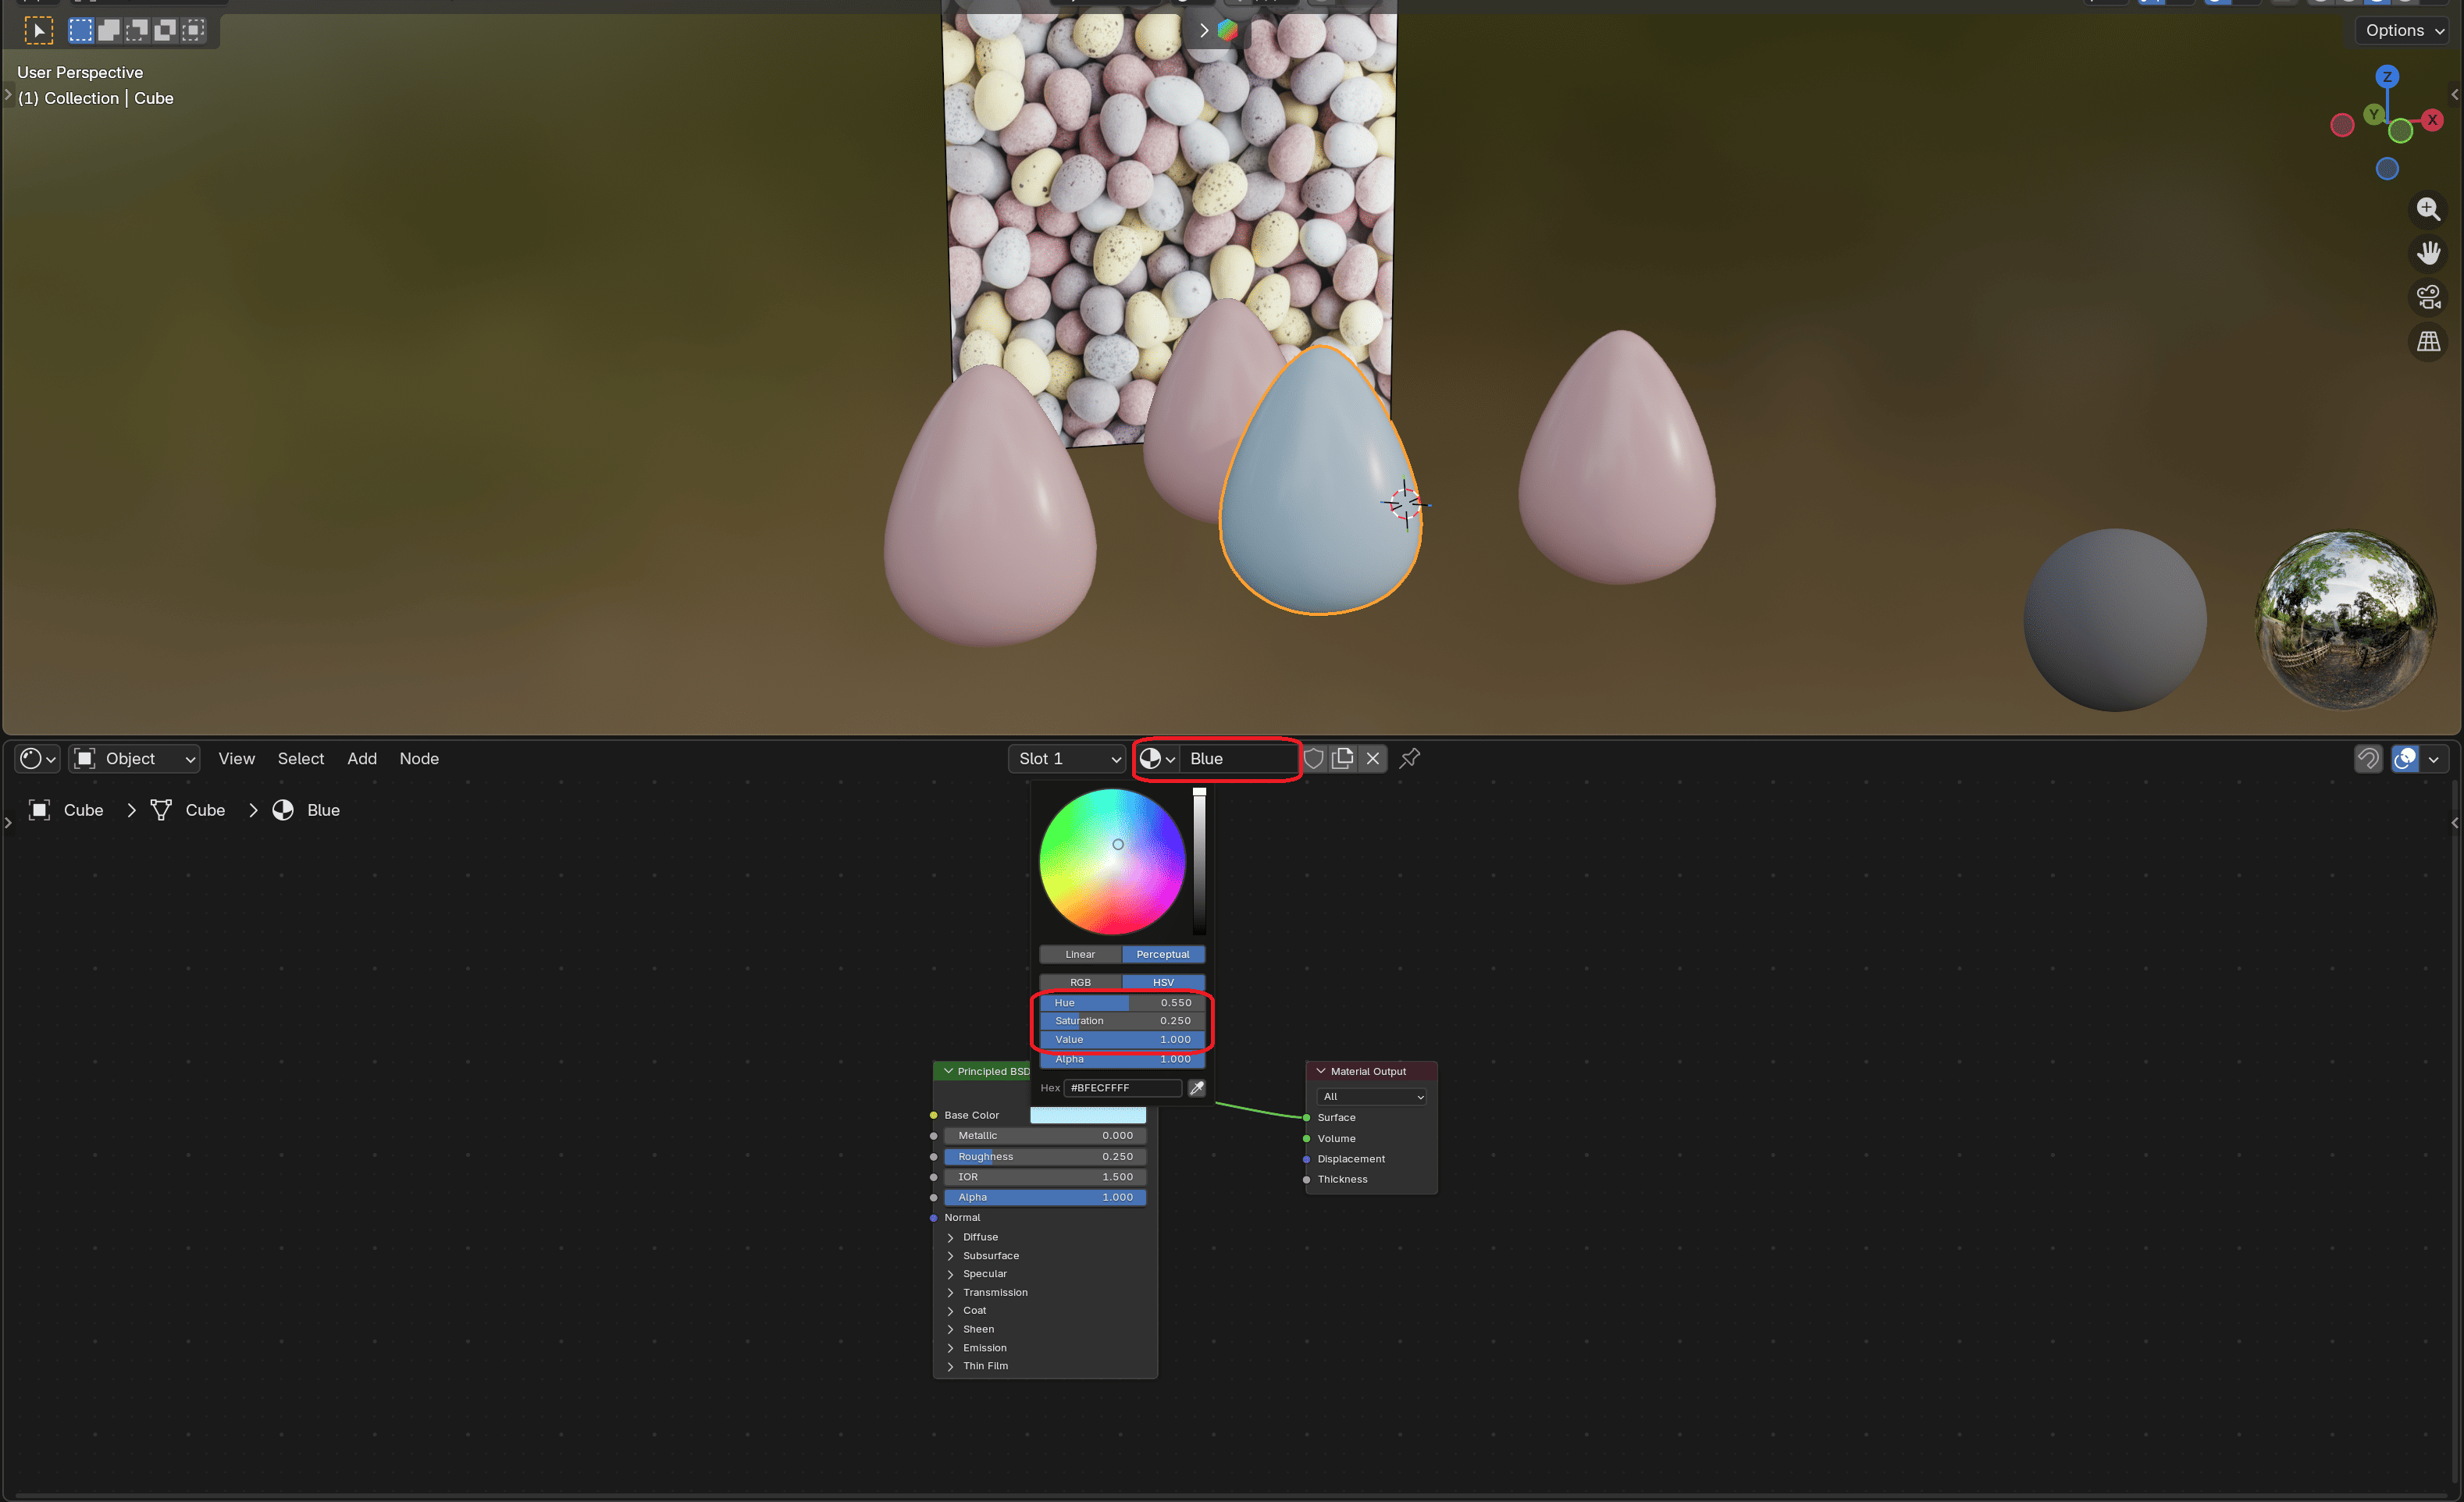
You can change a material's name by double clicking and editing it
Now it's your turn! The challenge is to create and apply the last two colors on your own.
The eggs are still perfect
I"ve bumped up the saturation a little to really highlight the color differences. The final HSV values are:
- Red (H=0.0, S=0.41, V=1.0)
- Blue (H=0.55, S=0.41, V=1.0)
- Yellow (H=0.15, S=0.41, V=1.0)
- Purple (H=0.75, S=0.41, V=1.0)
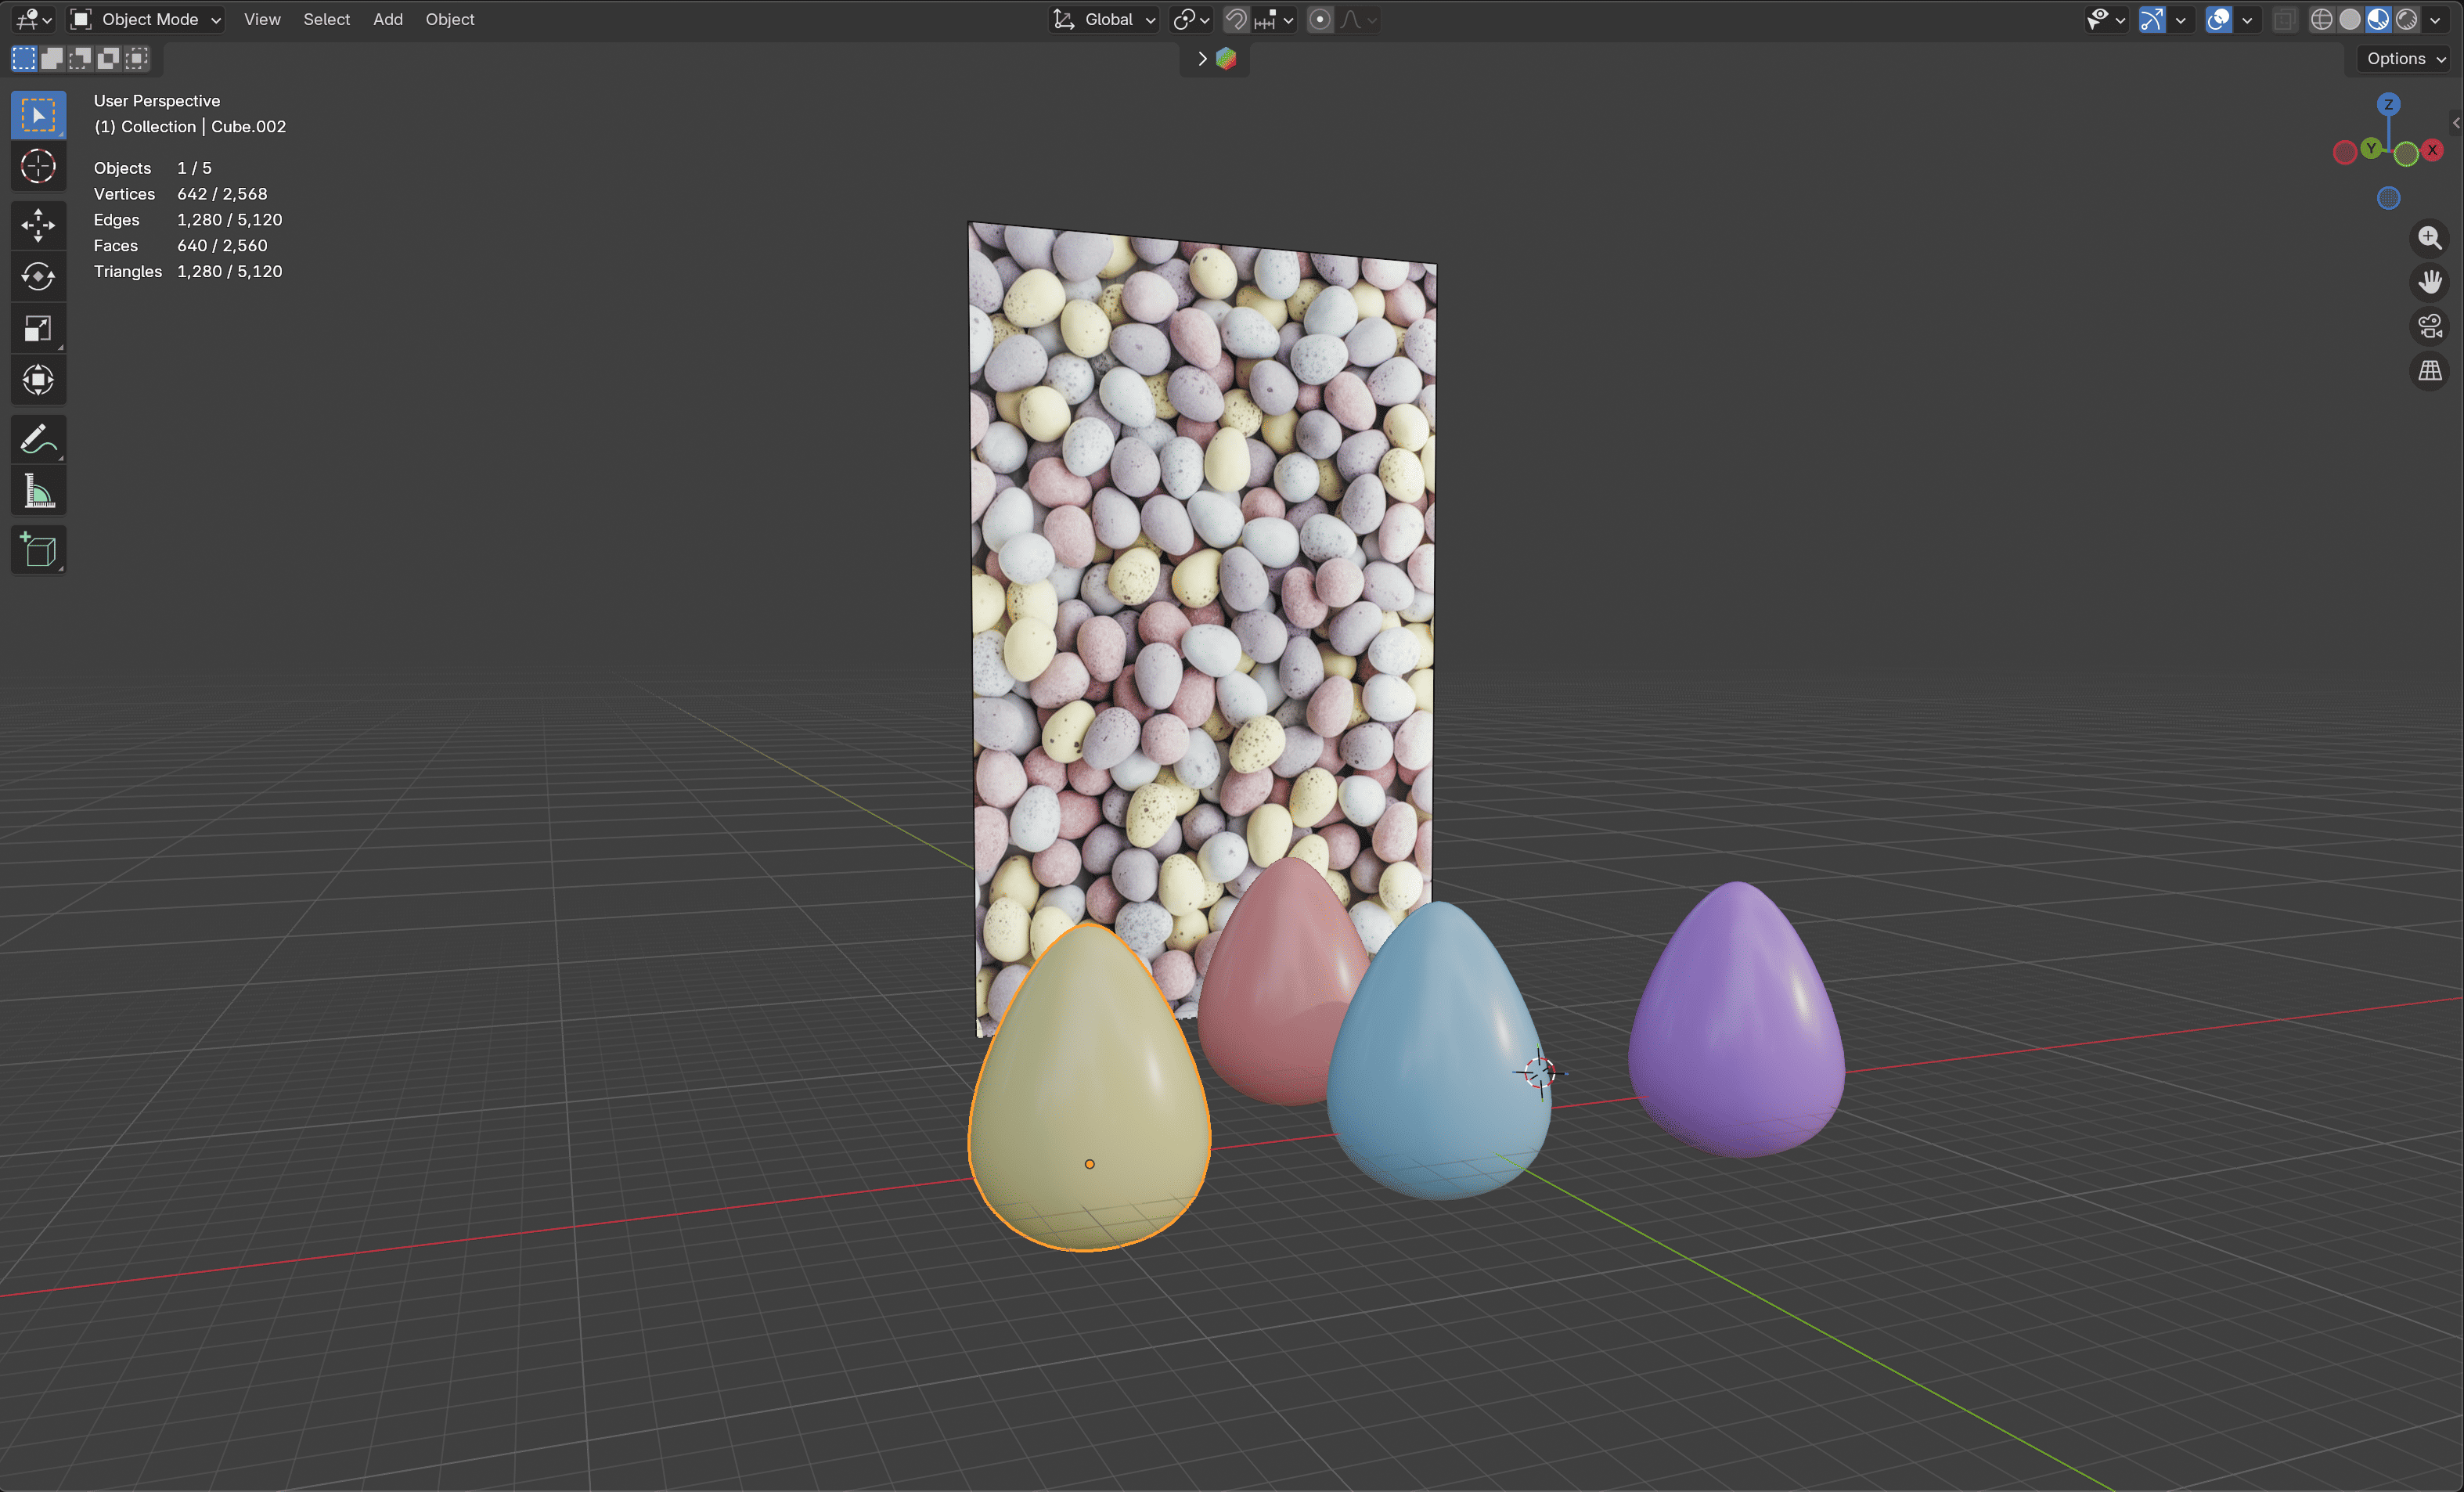
Now, the last thing we need to match the Easter theme is a few patterns
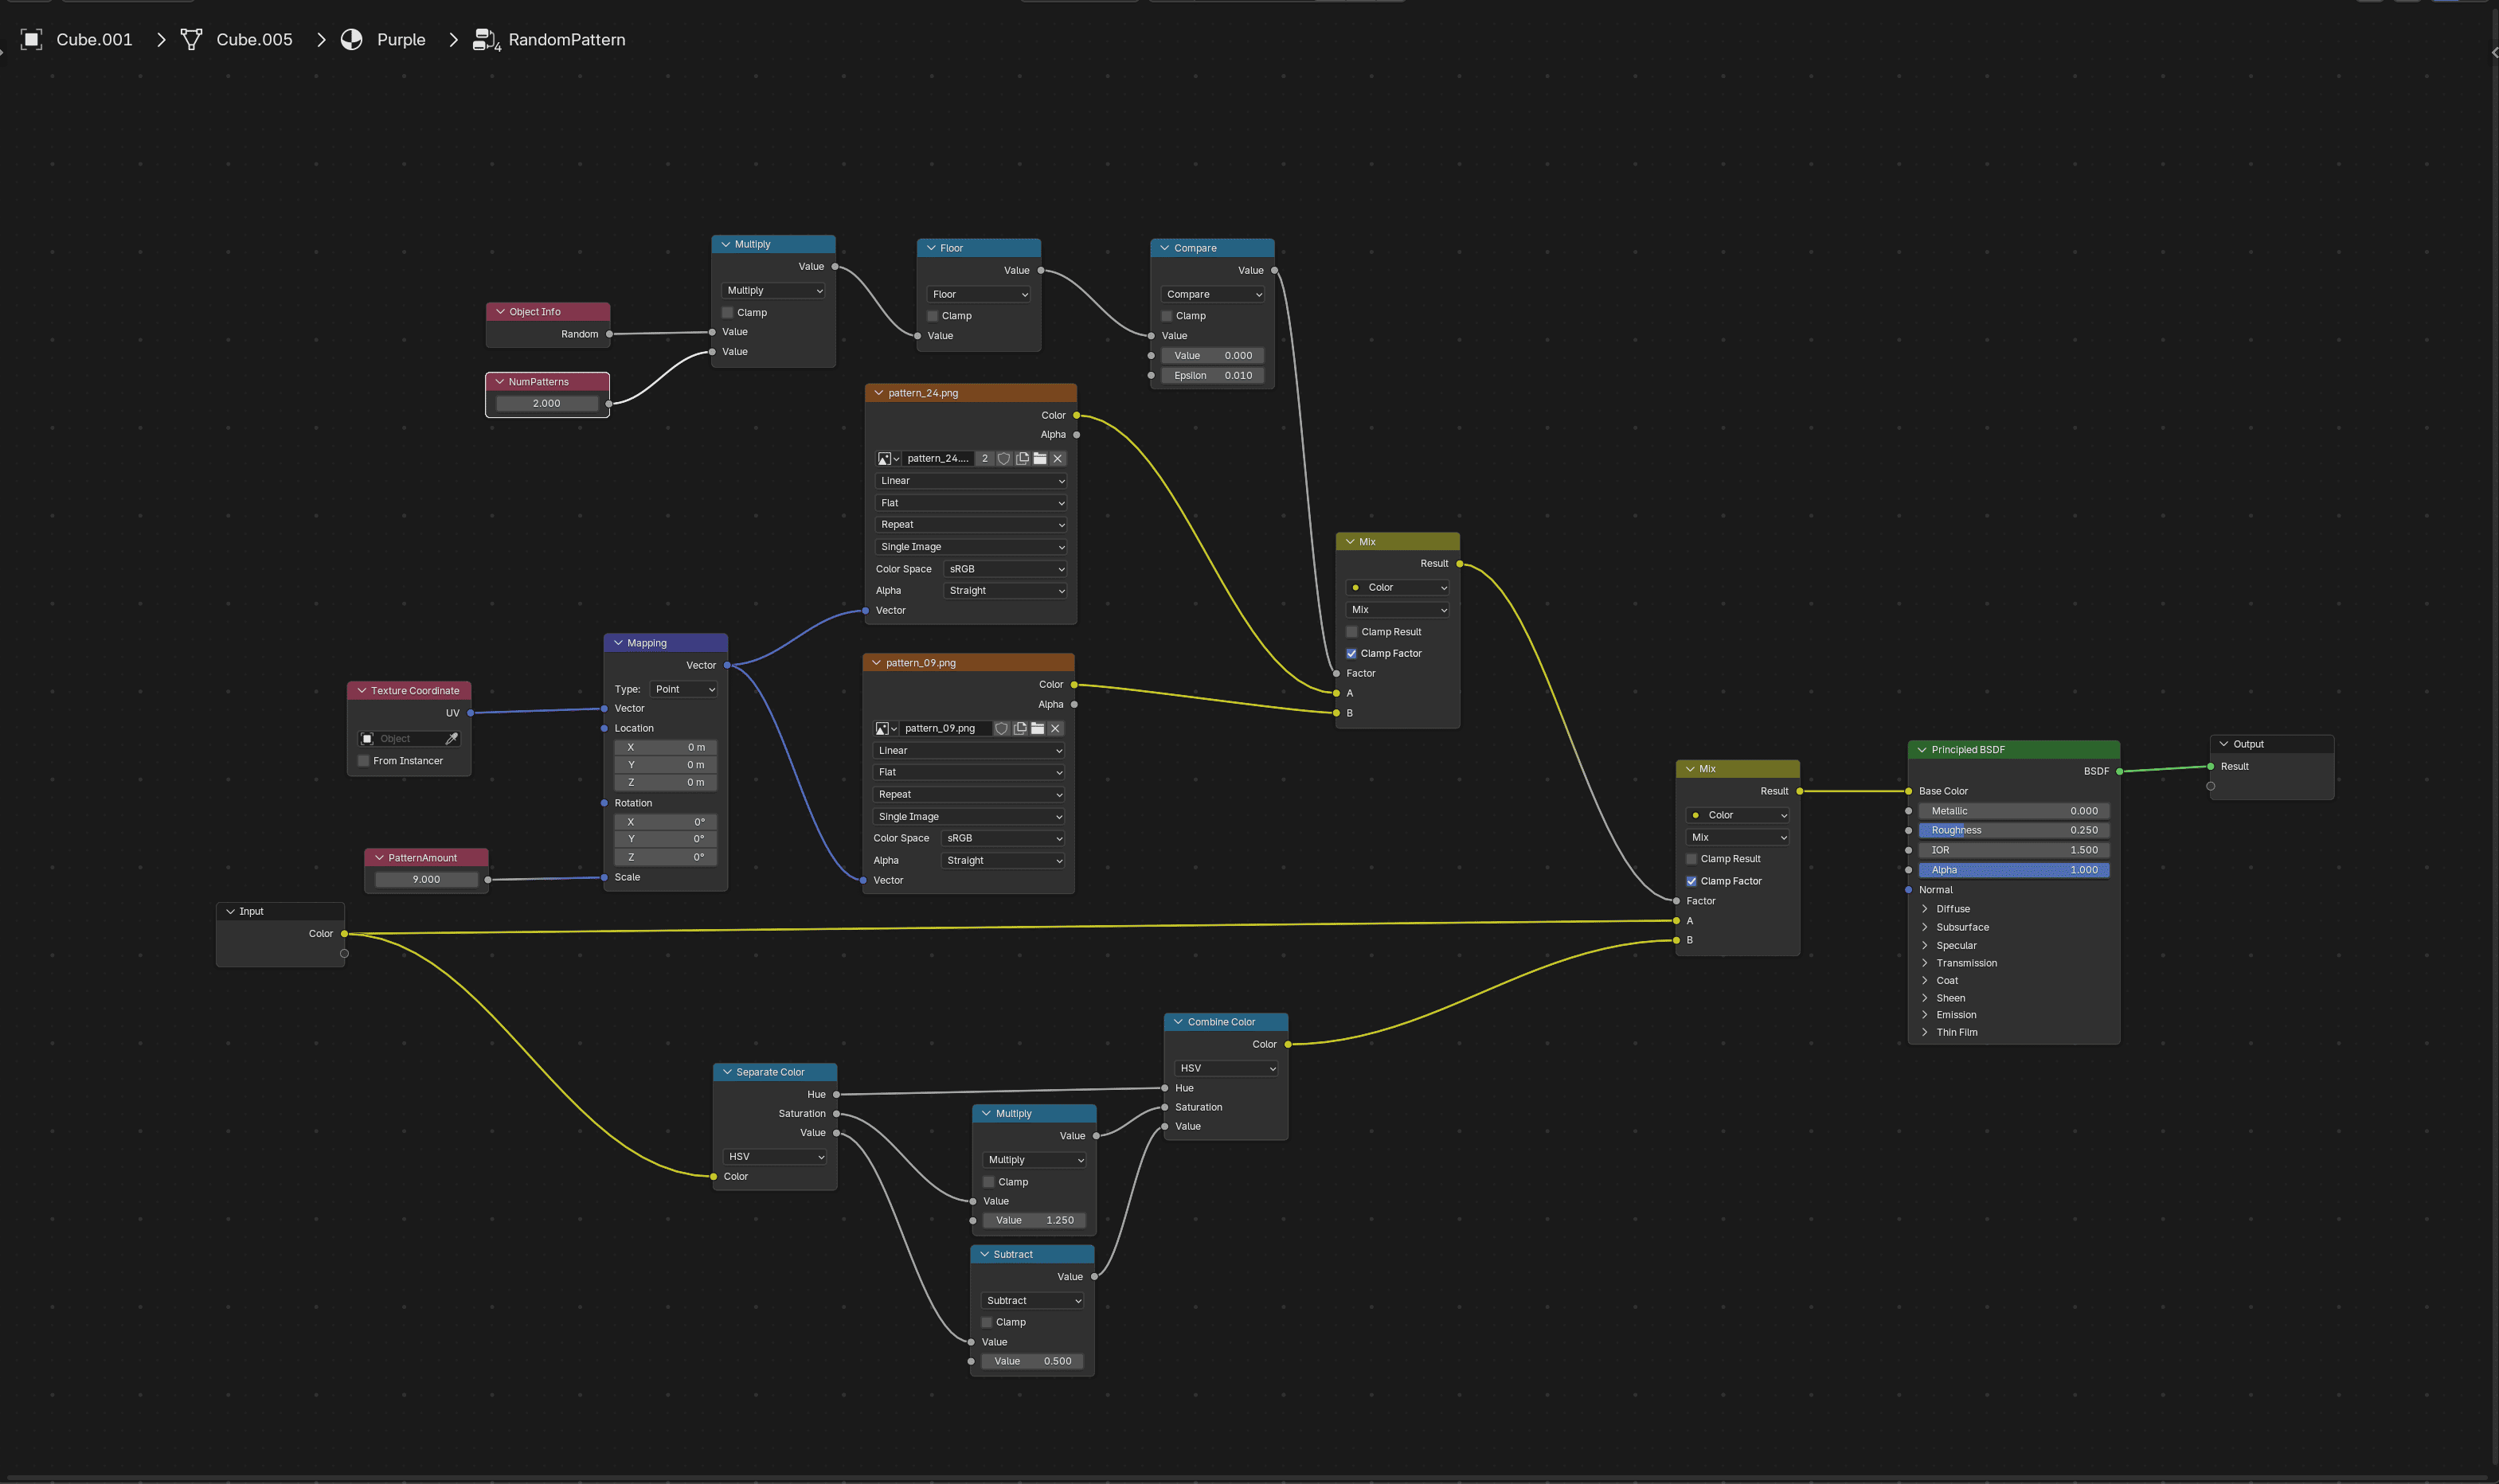
Wish I had the magical "RandomPattern"
It would be great to have something like the RandomPattern node that paints each egg automatically. Unfortunately, Blender doesn"t have such a handy function for us, but fortunately, we are capable of creating one ourselves.
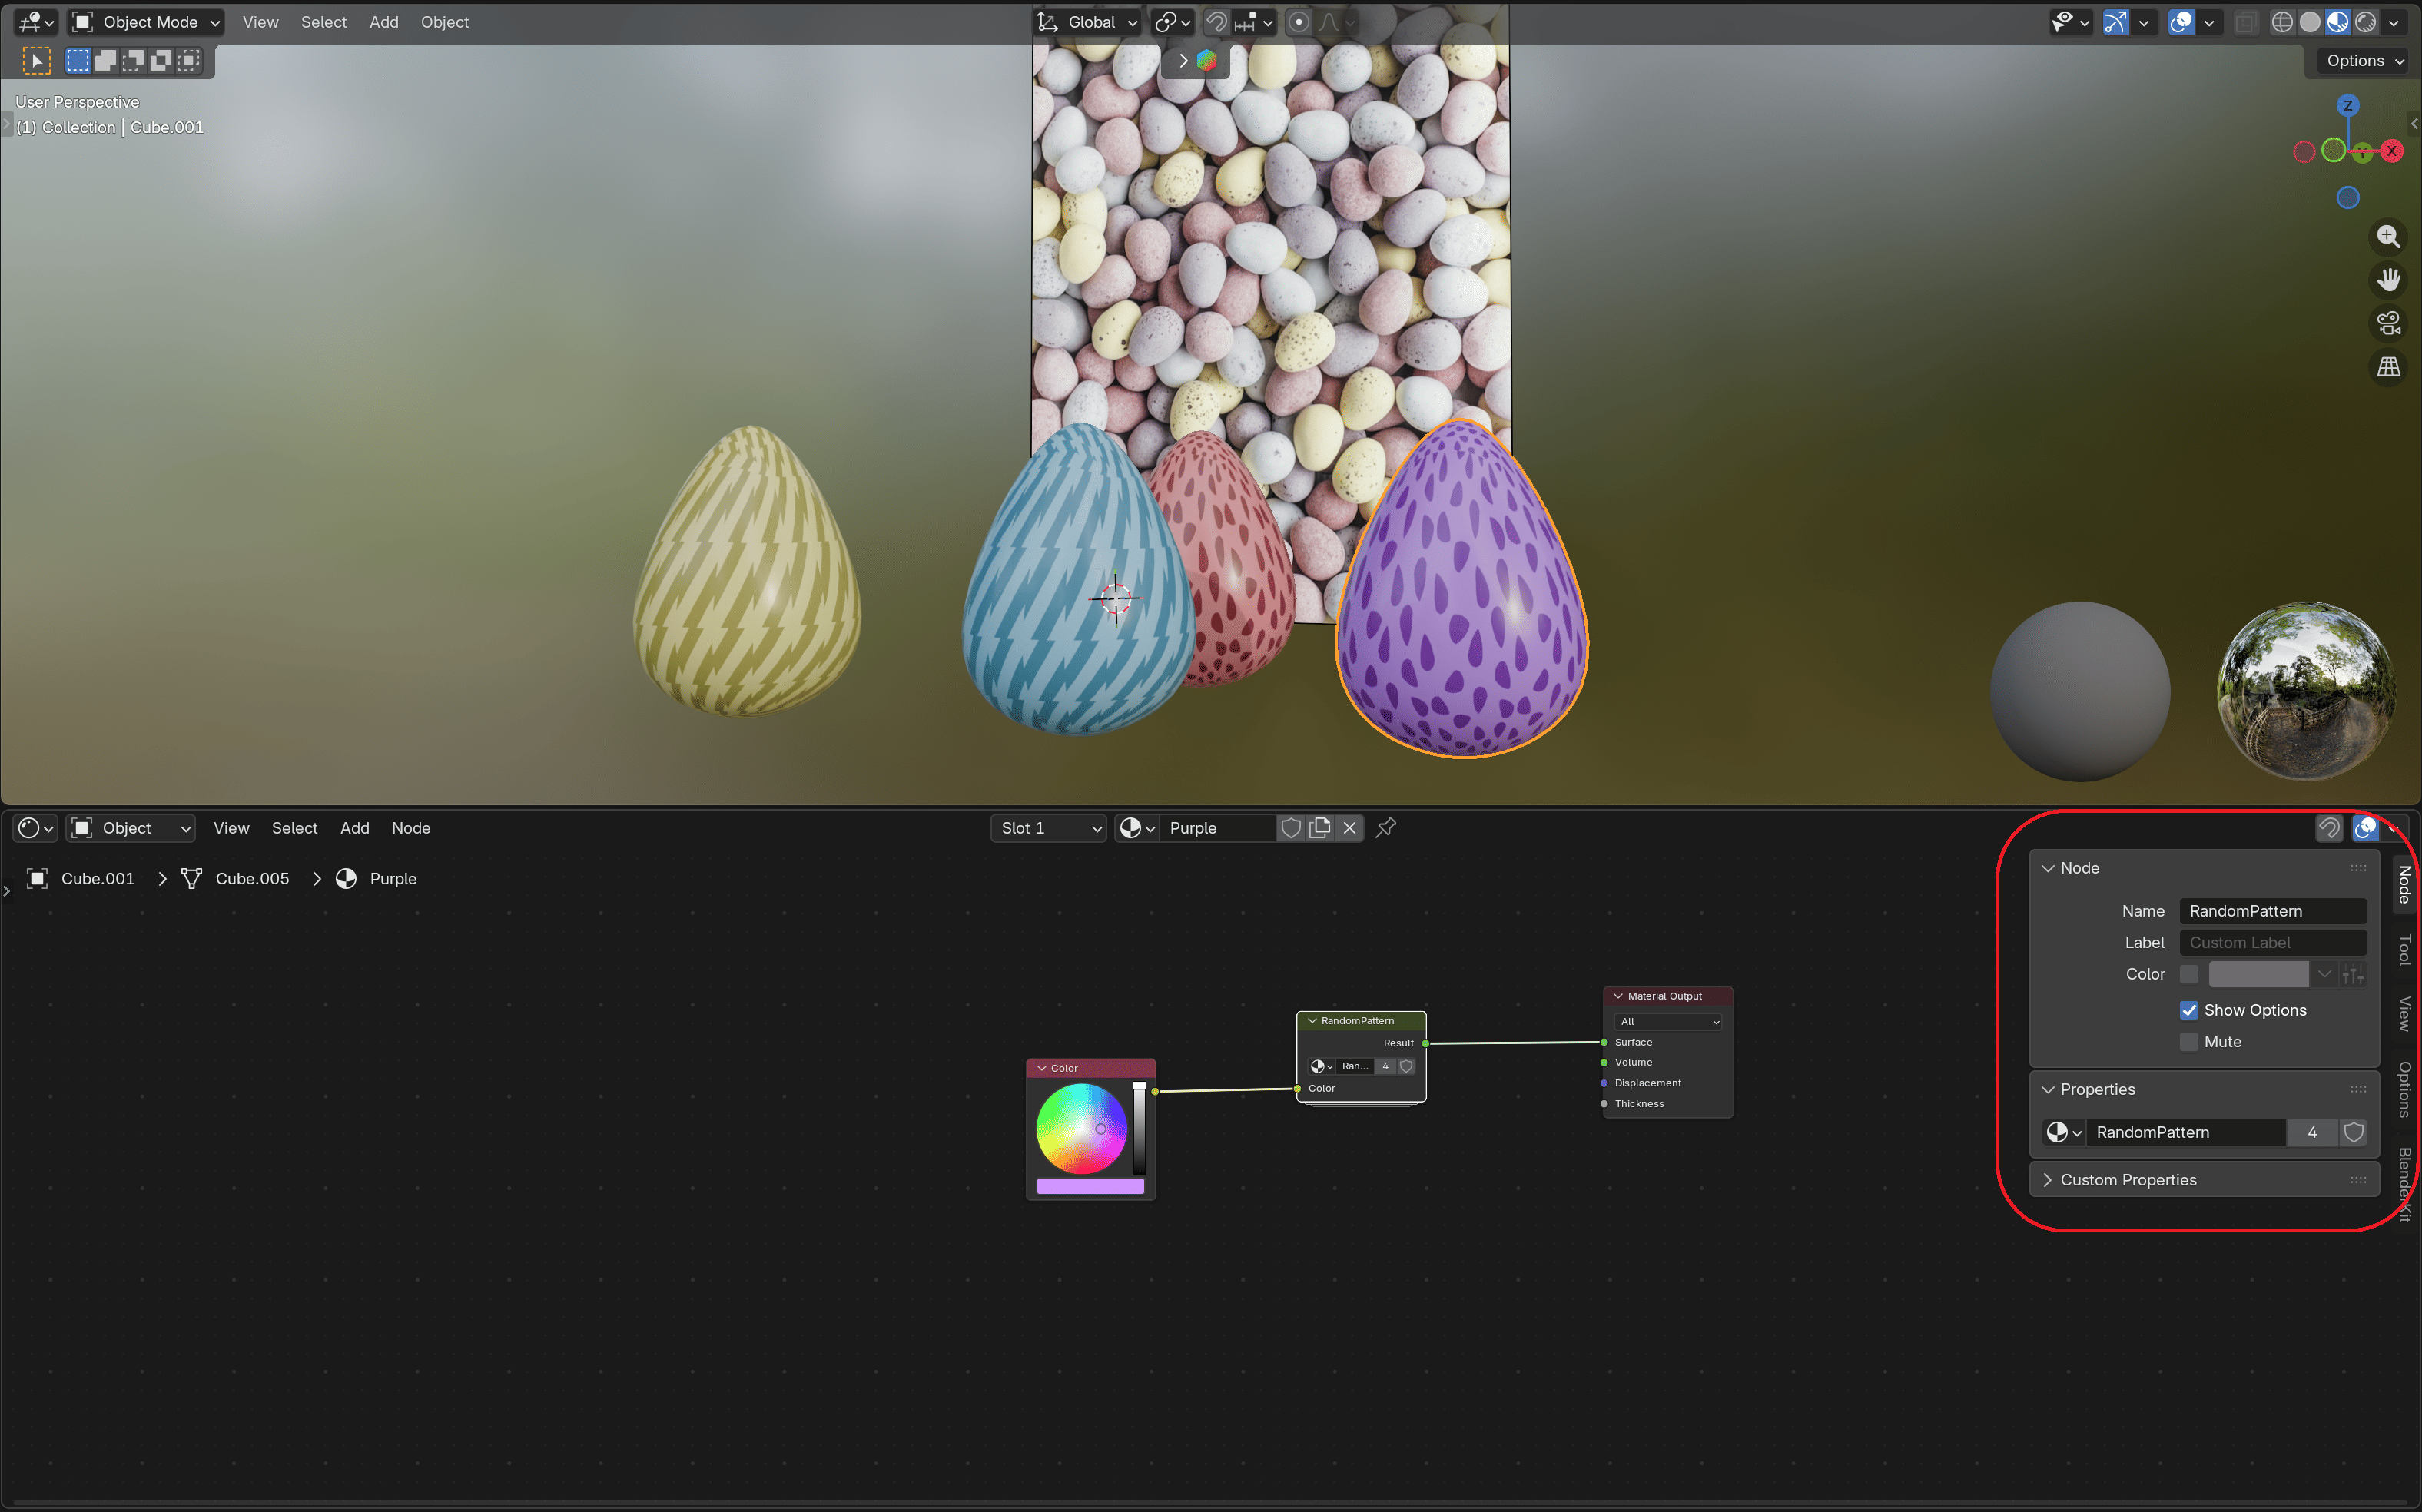
Where do I get patterns?
Fortunately, this course is not the only free resource on the internet. We can download and freely use a Pattern Pack by the awesome creator Kenney.
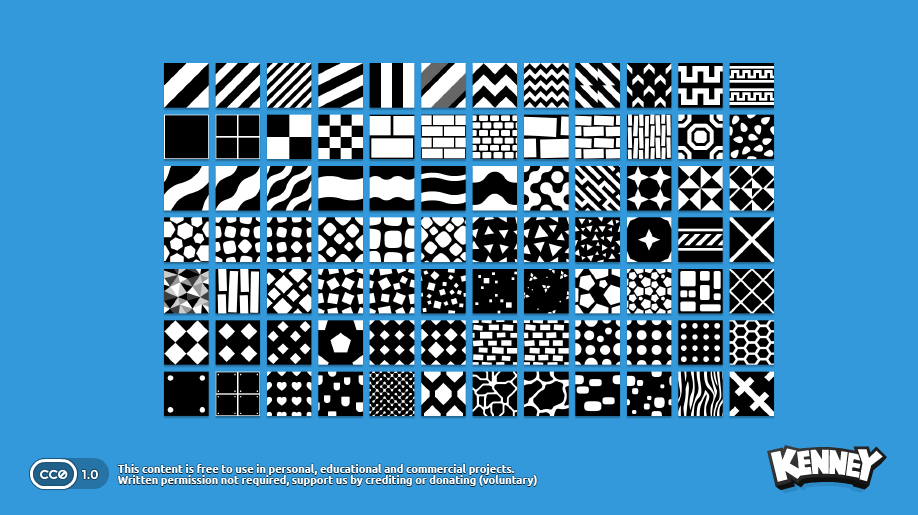
It's important to understand WHY the patterns are white on a black surface.
In computer graphics, a white color equals 1 and black equals 0. When you use a black-and-white mask like this, you are telling your graphics card: "Paint only where you see a value of 1."
That is the core principle of pattern application in this challenge.
How can I build the "RandomPattern"?
It's time to get our hands dirty in Shading. Let's establish the expected results from our "RandomPattern" node and implement them one by one:
- Apply and control the amount of the pattern on the model
- Darken the pattern while keeping the original egg color intact
- Randomize between different patterns
How to apply a pattern
Essentially, to see a pattern on the egg, you need to take your base color and mix it with the pattern texture that overlays it. You need to add a combination of three nodes to the egg's material graph:
- Color
- Image Texture
- Mix Color
+ Add a node
 Search by typing it's label, e.g. "Mix Color"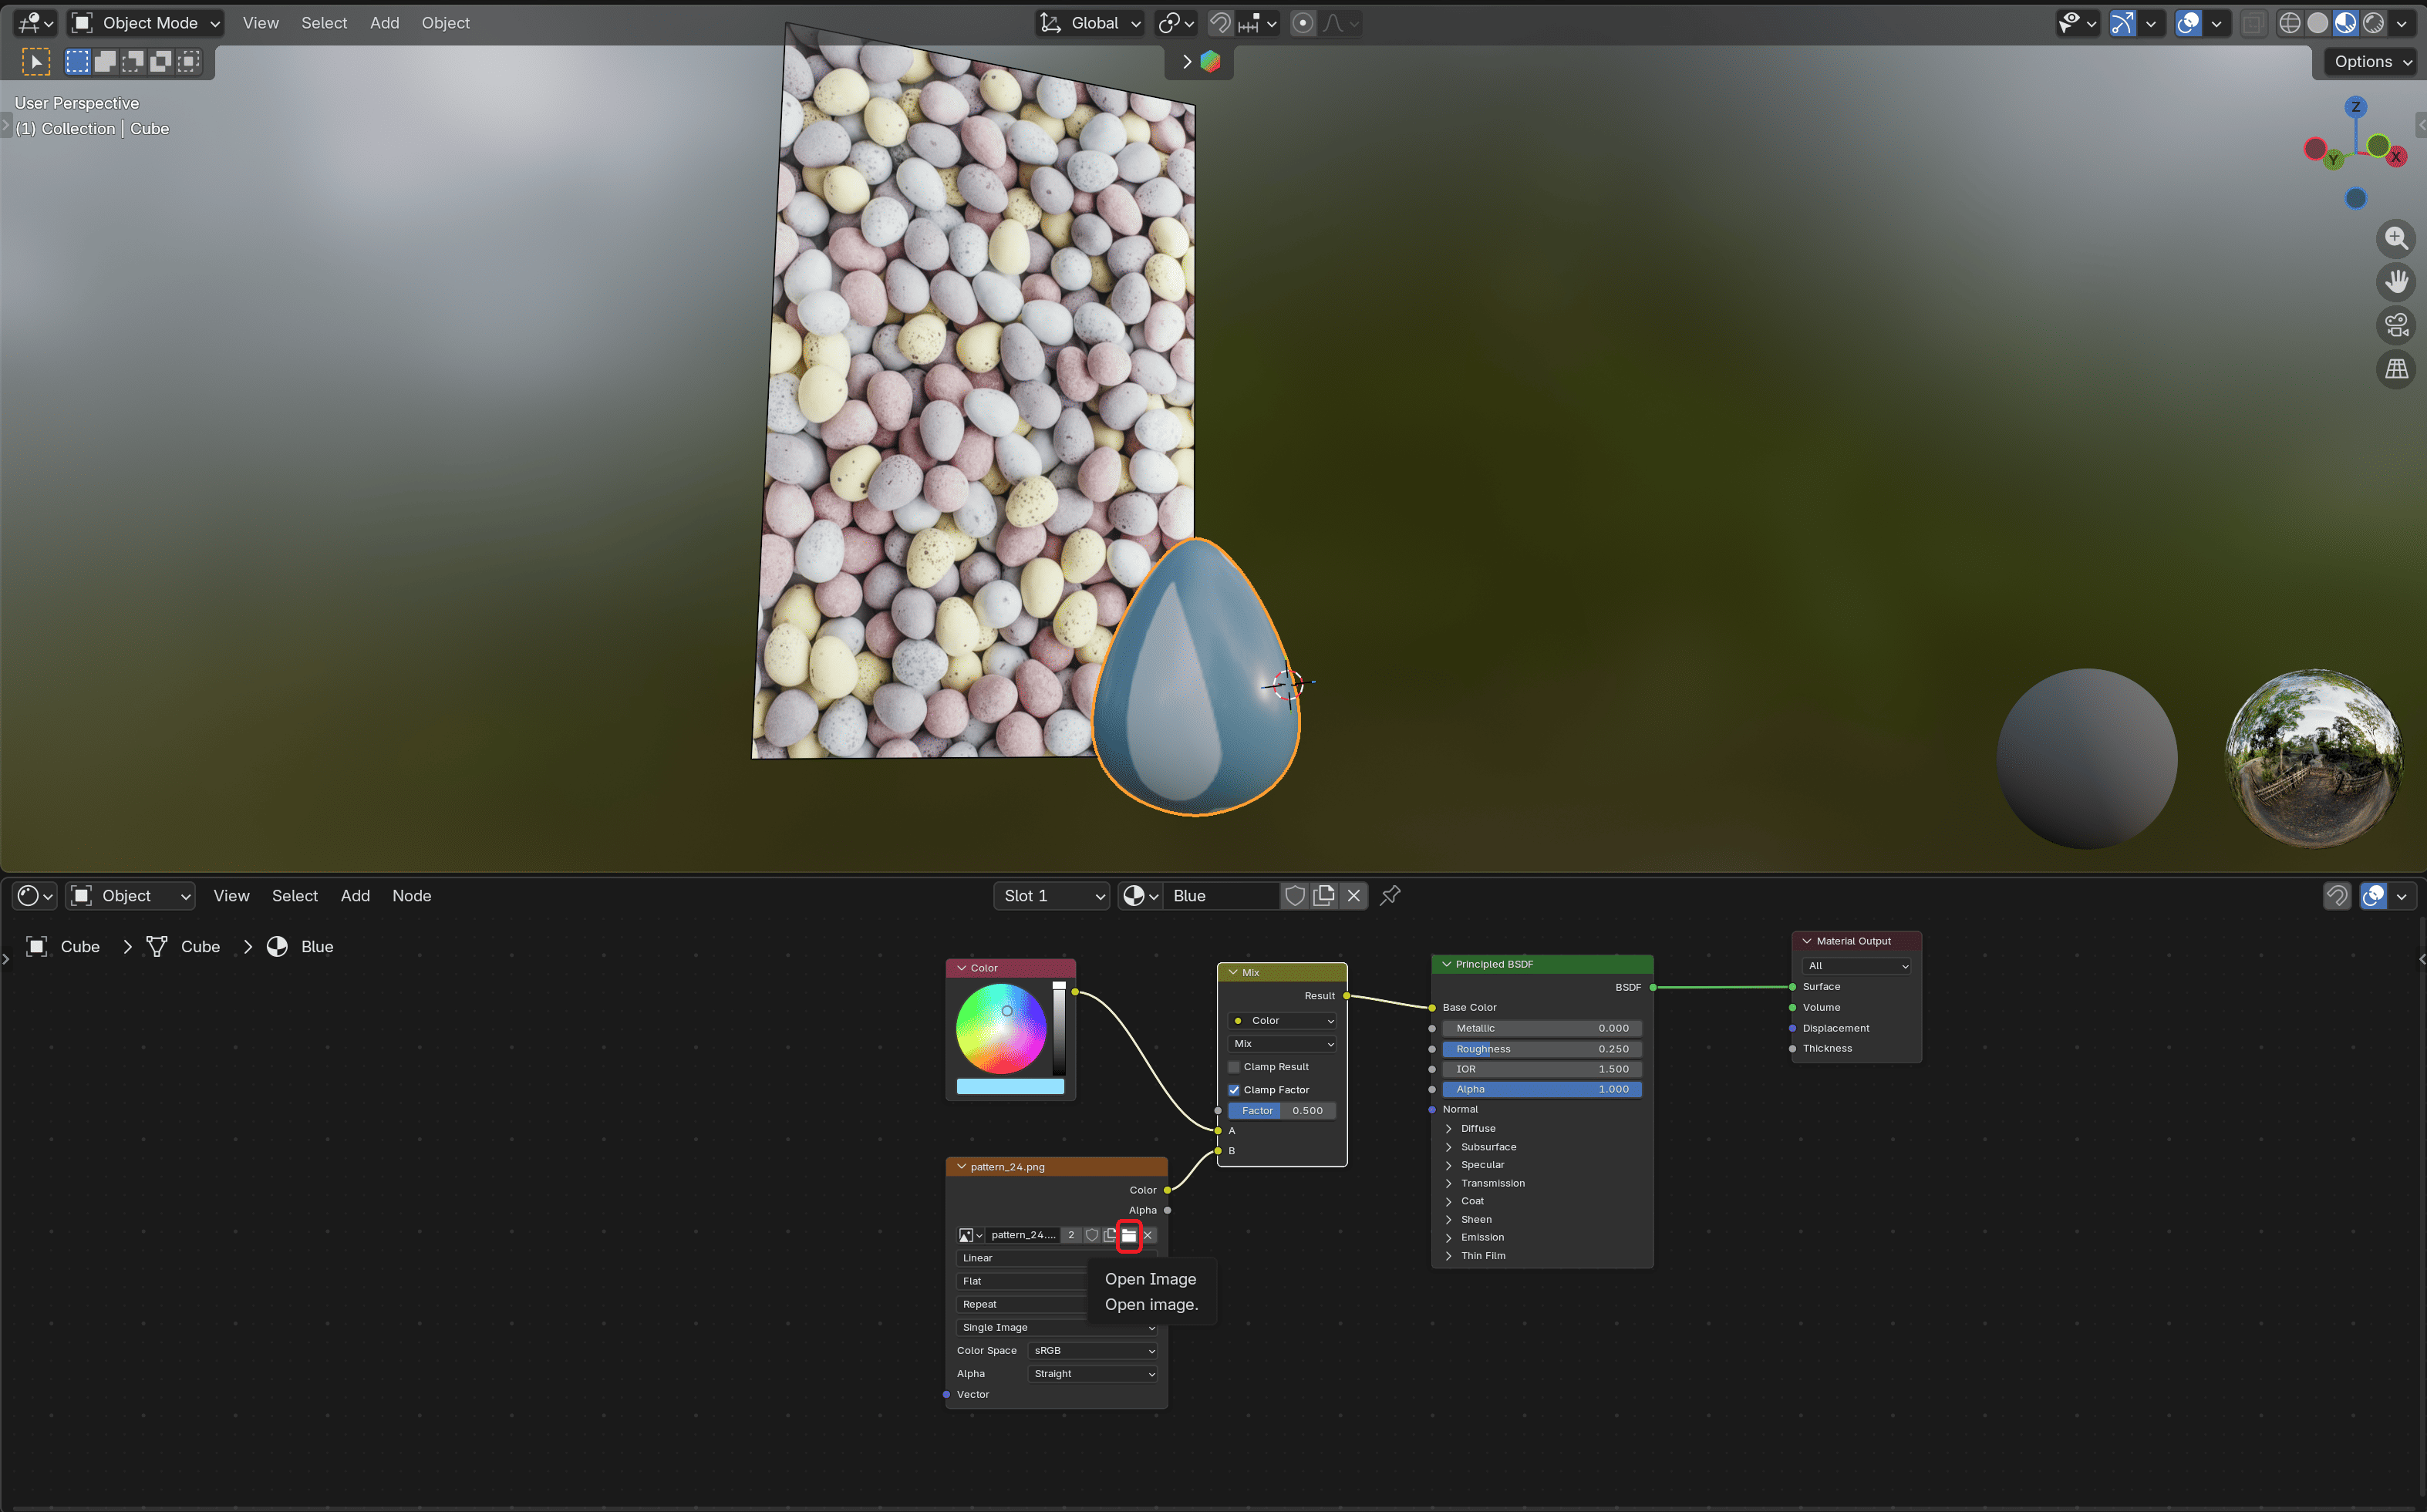
Pick your own favorite pattern!
How to scale a pattern (increase/decrease the details amount)
Once again, we need three nodes to help us handle the step:
- Grab the model's UV layout via a Texture Coordinate (UV) node
- Scale it up to repeat the pattern using a Mapping node combined with a Value node
- Feed that output into the Pattern Texture to project it onto the egg
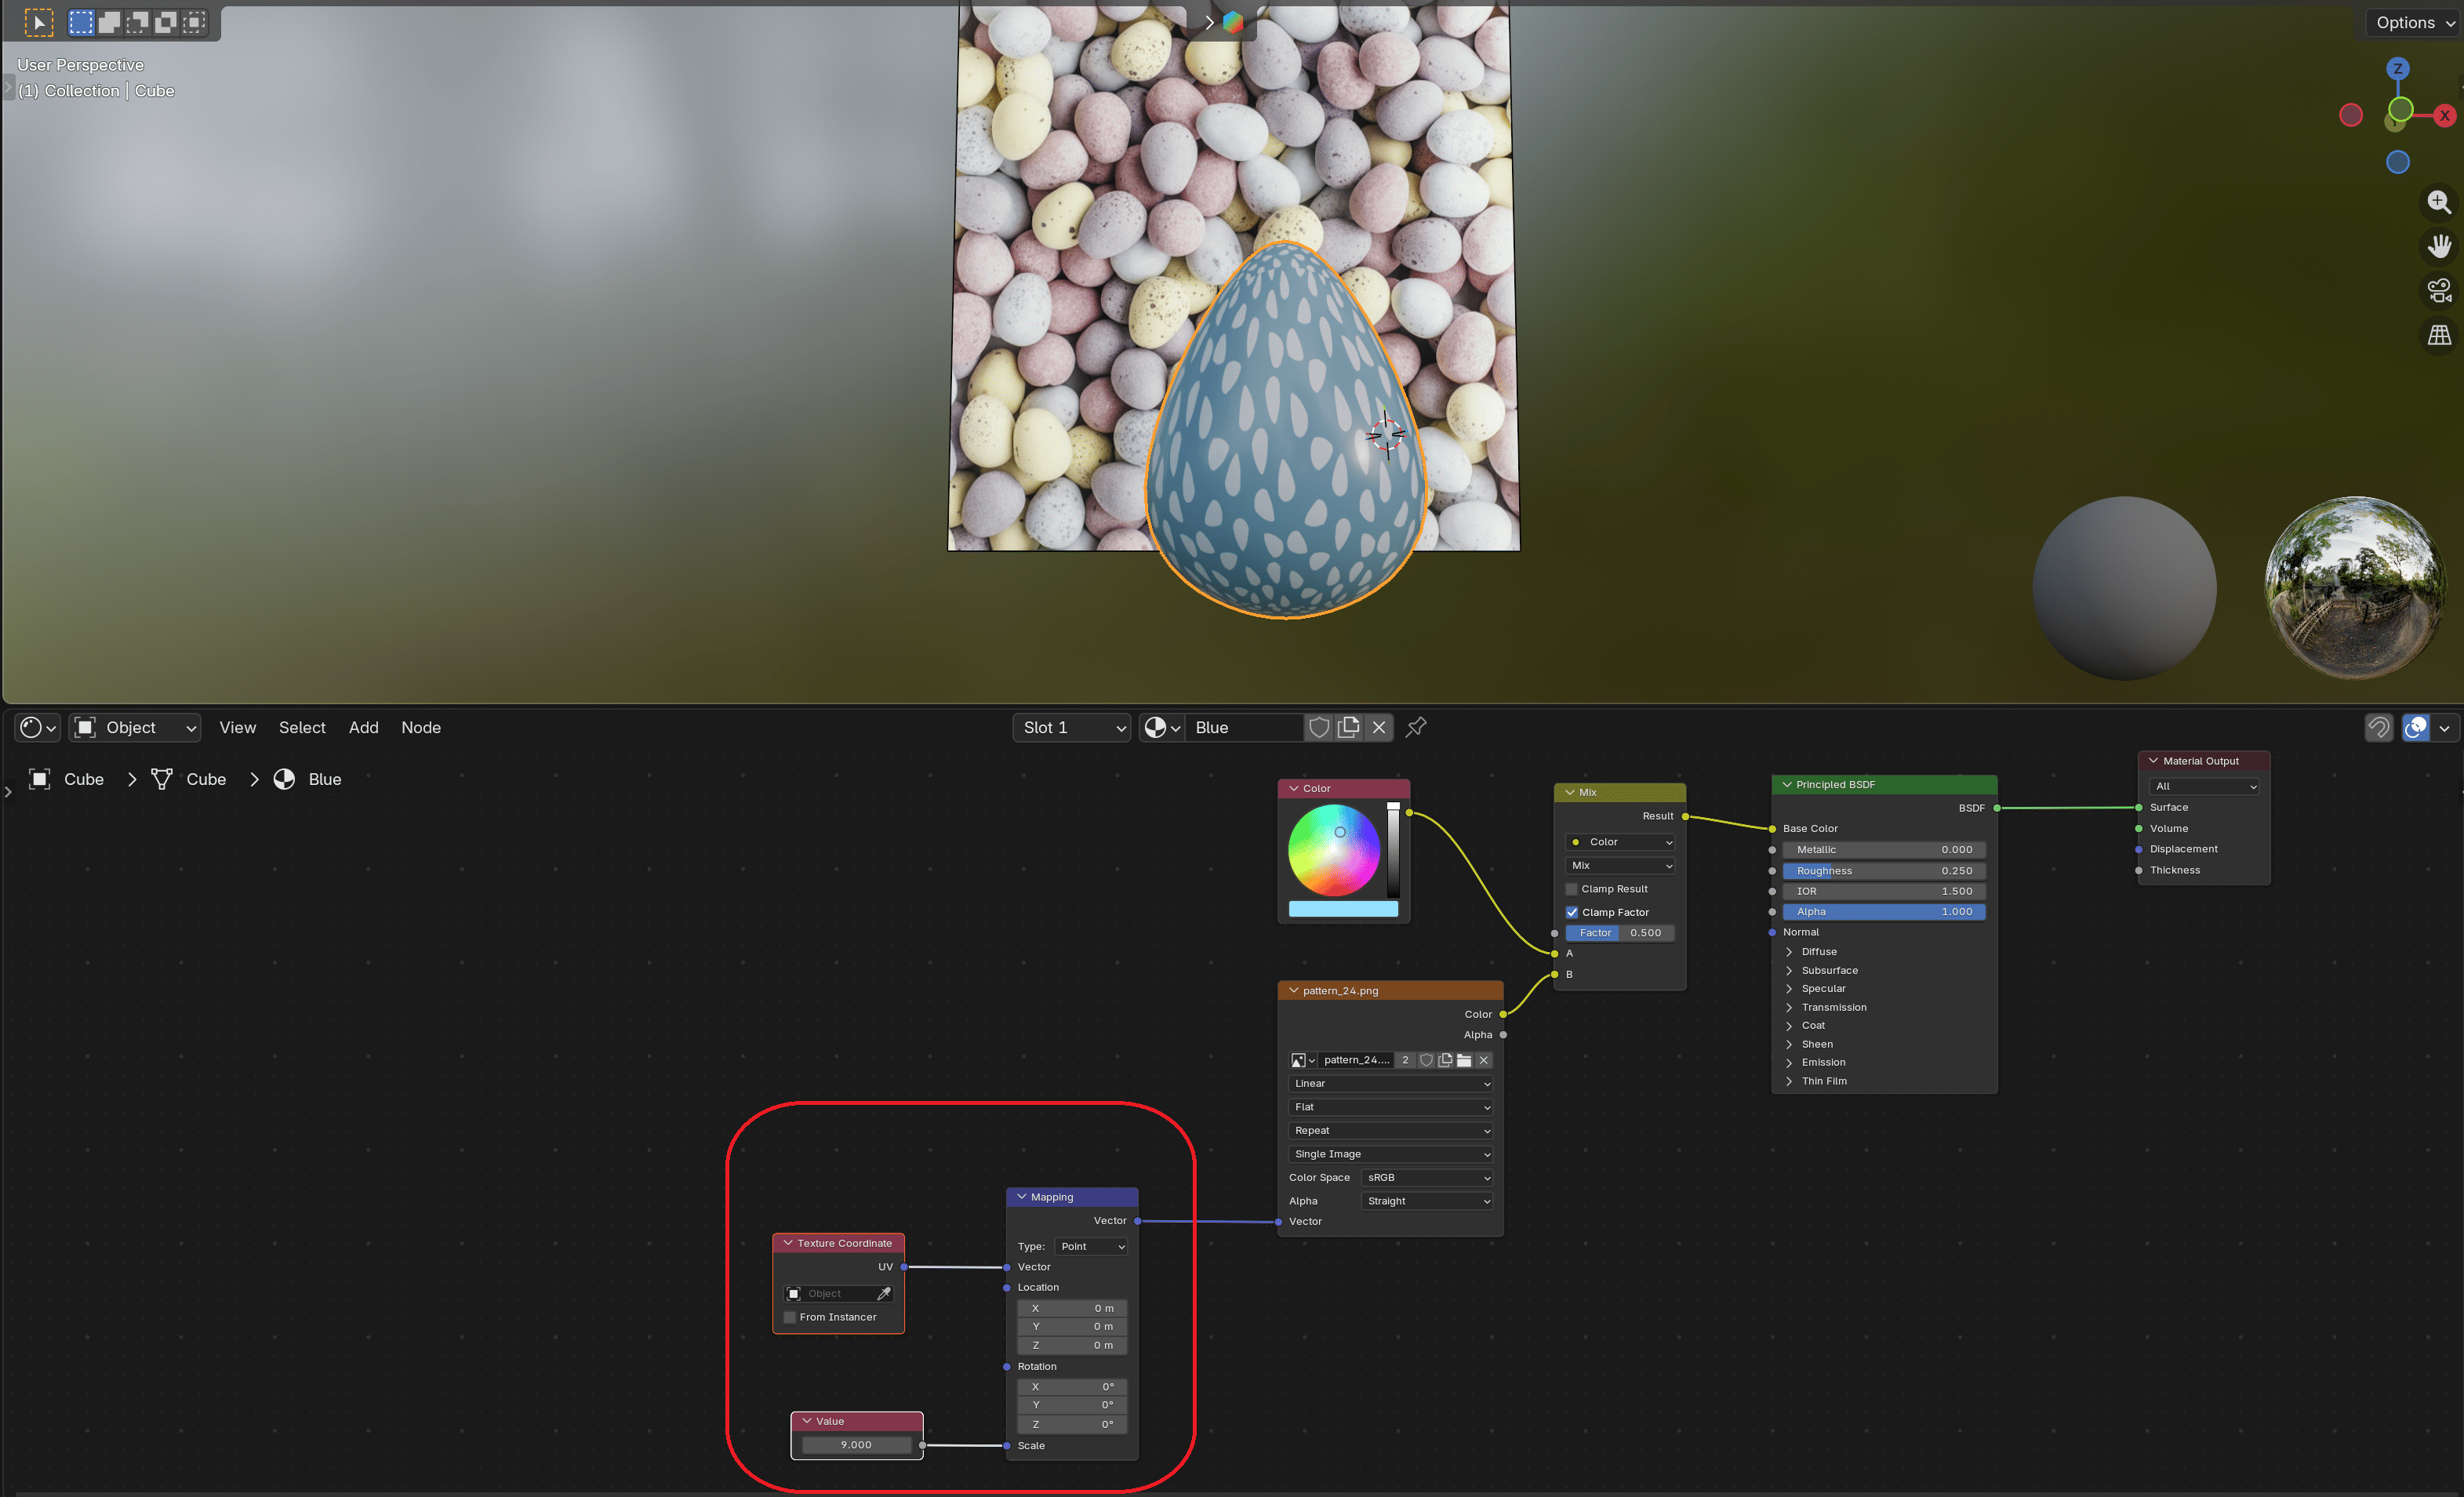
How to darken a pattern
To truly darken the pattern on any of the egg variations, you will want to reuse and modify its original color properties. To do that, we are going to use five more nodes:
- Separate Color (HSV): Extracts each component of the original color
- Multiply: Boosts the saturation to enrich the color
- Subtract: Lowers the value to drastically darken the color
- Combine Color (HSV): Recombines the modified color channels
- Mix Color: Drives the pattern texture to isolate and apply these dark values
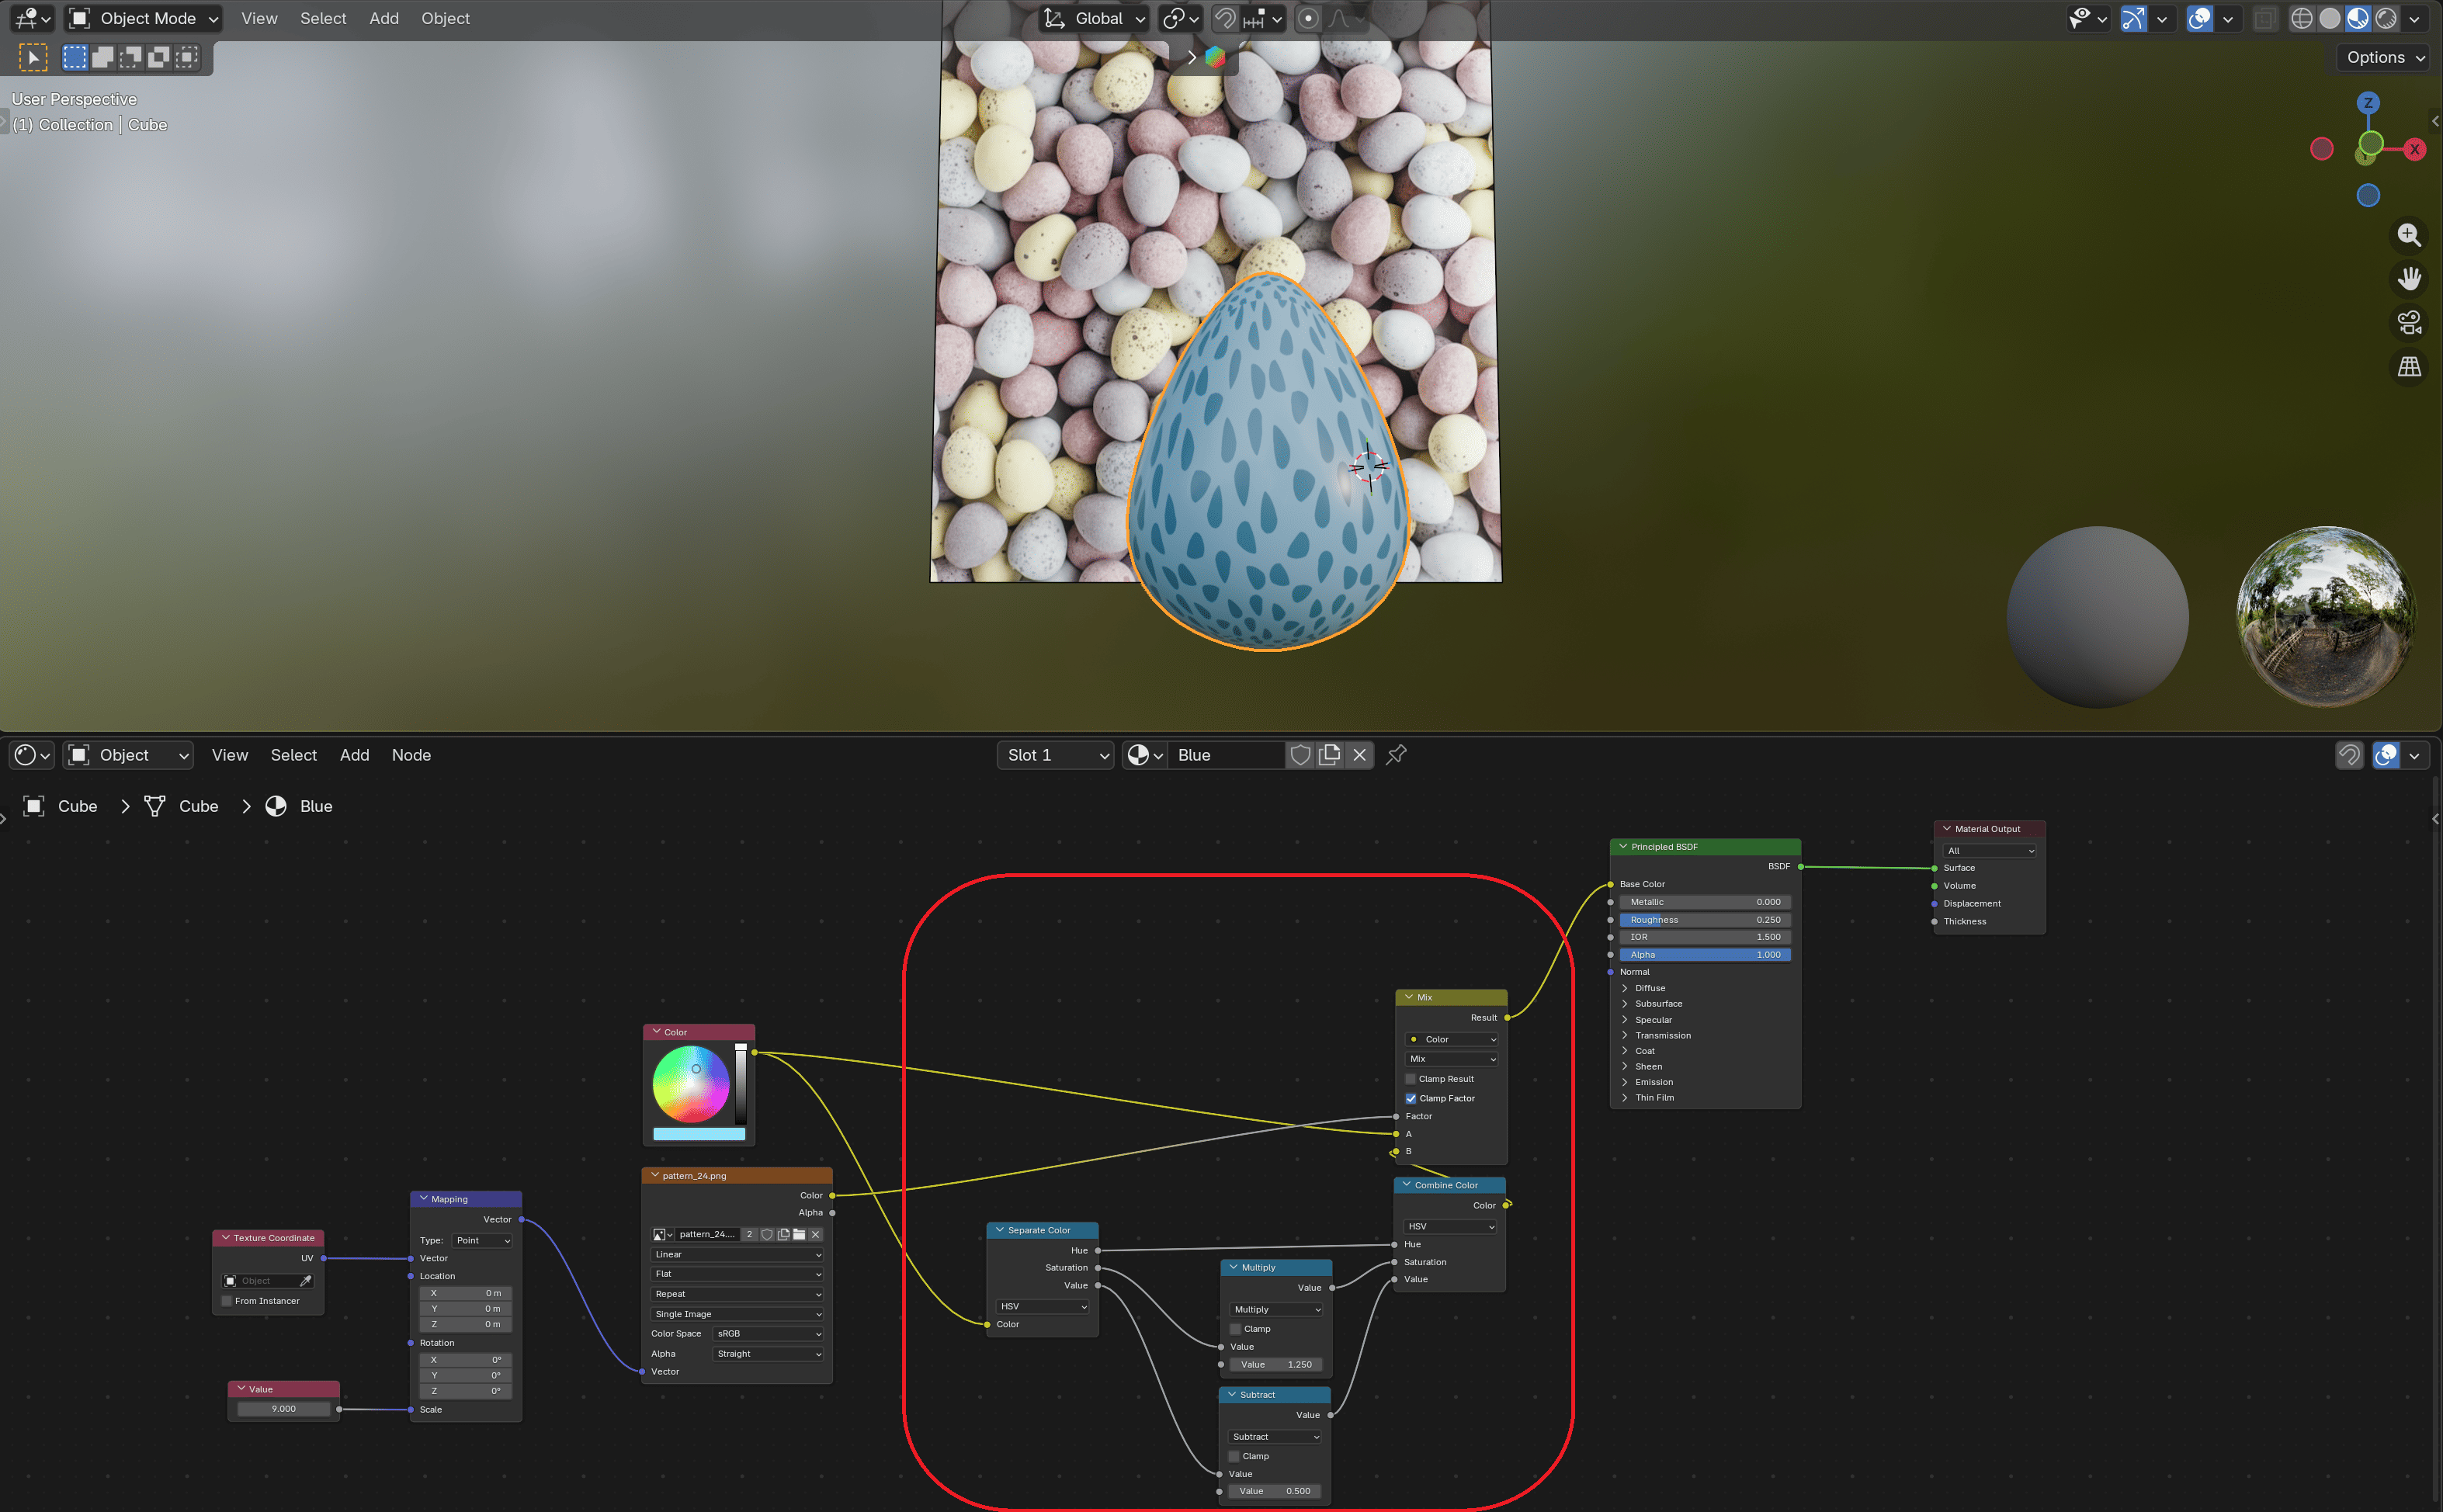
Pattern Texture is now connected to the Factor input of the Mix Color node, driving the darker color from input B only where the texture is white (as explained in the "Tip" above)
How can I reuse the "RandomPattern"?
Once you build such a sophisticated function, you won't want to copy and paste this mix of nodes from one material to another. Instead, you can group the nodes into your own reusable Node Group.
Click and hold to select Cover all nodes except the "Color" - it will be used as an input
 +
+ Group the selected nodes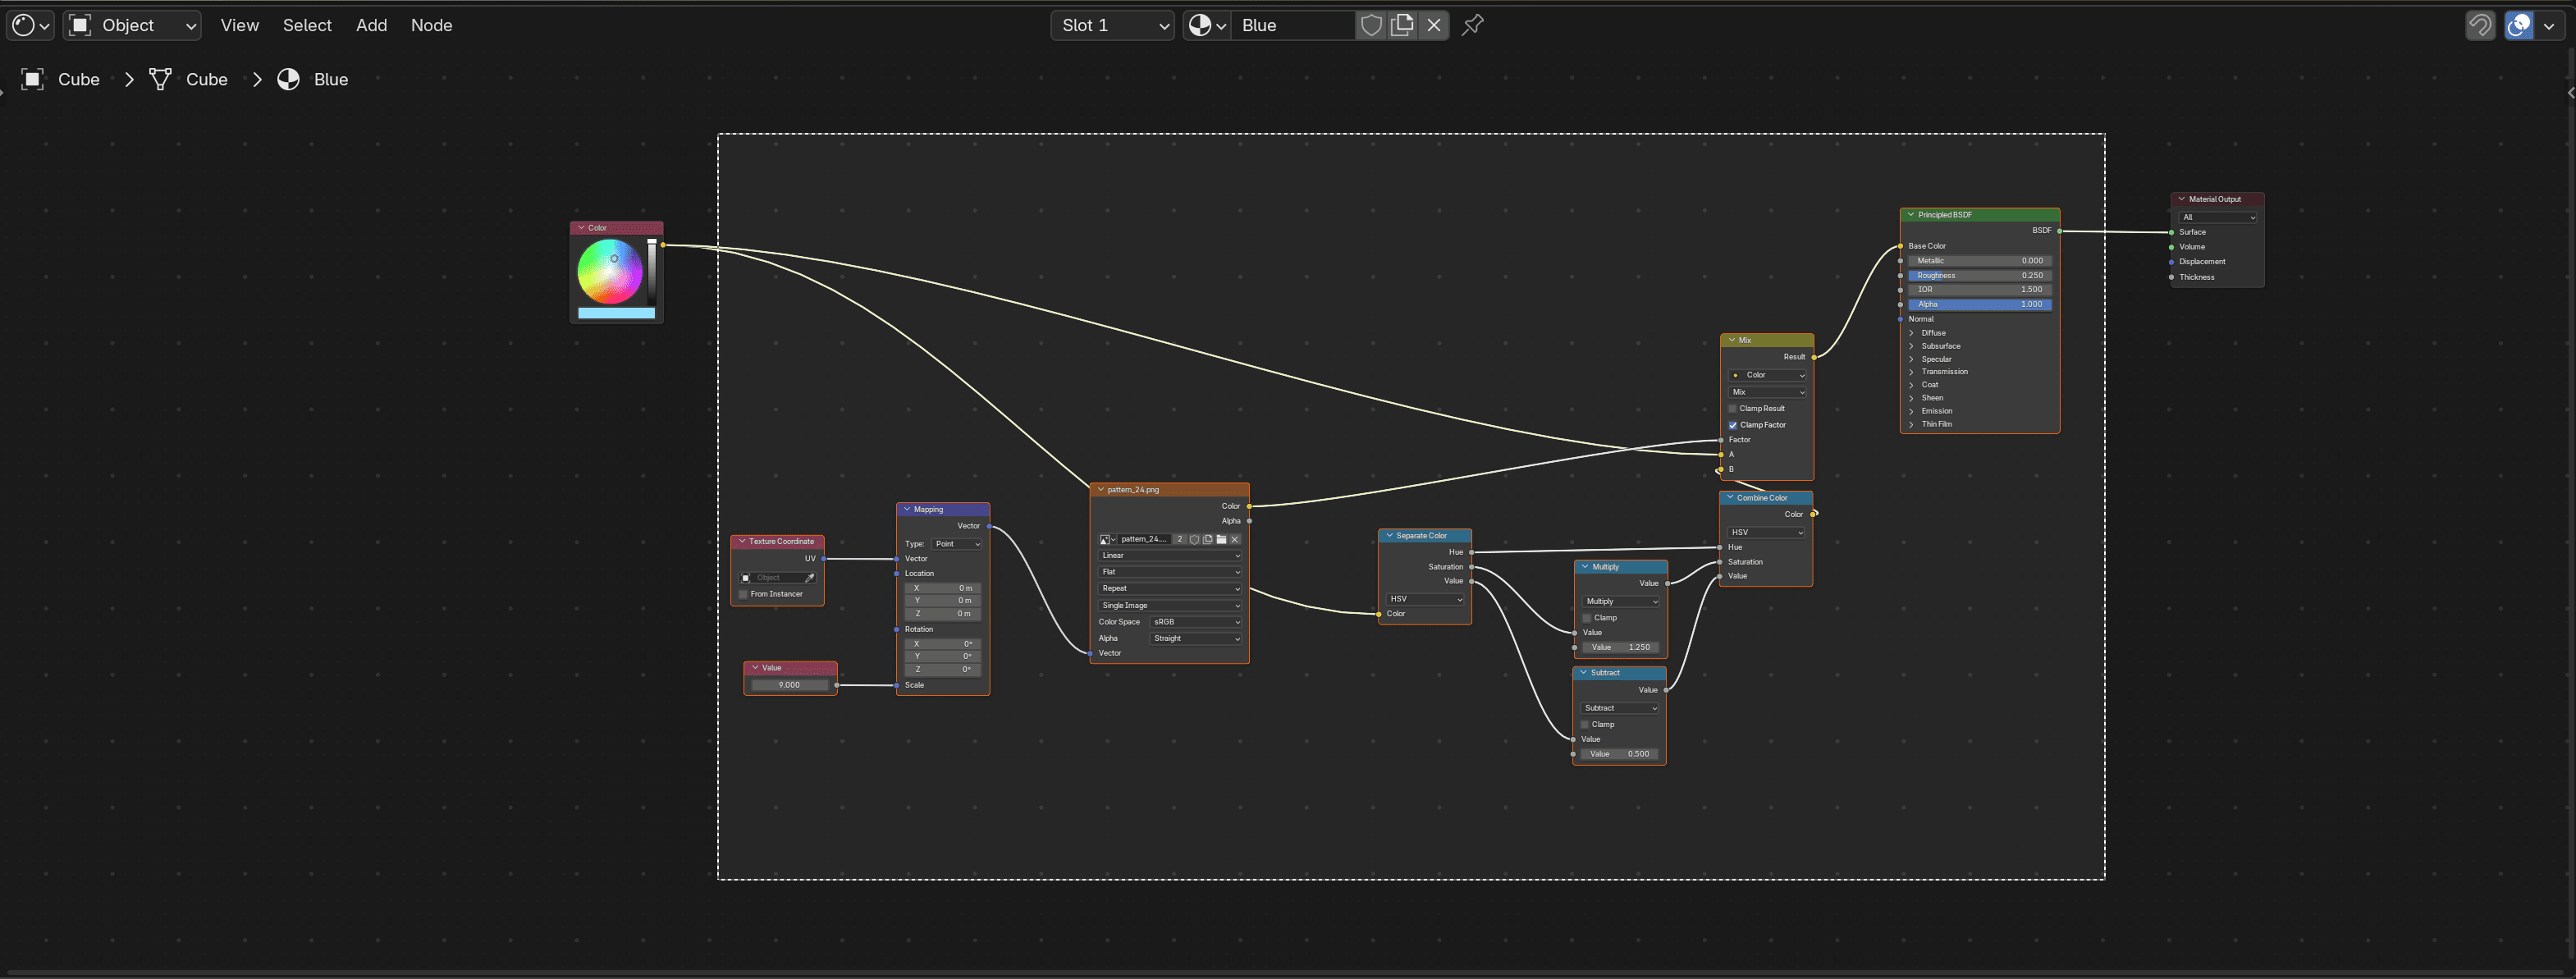
To return to your main material, use the breadcrumbs in the top-left corner of the shader editor.
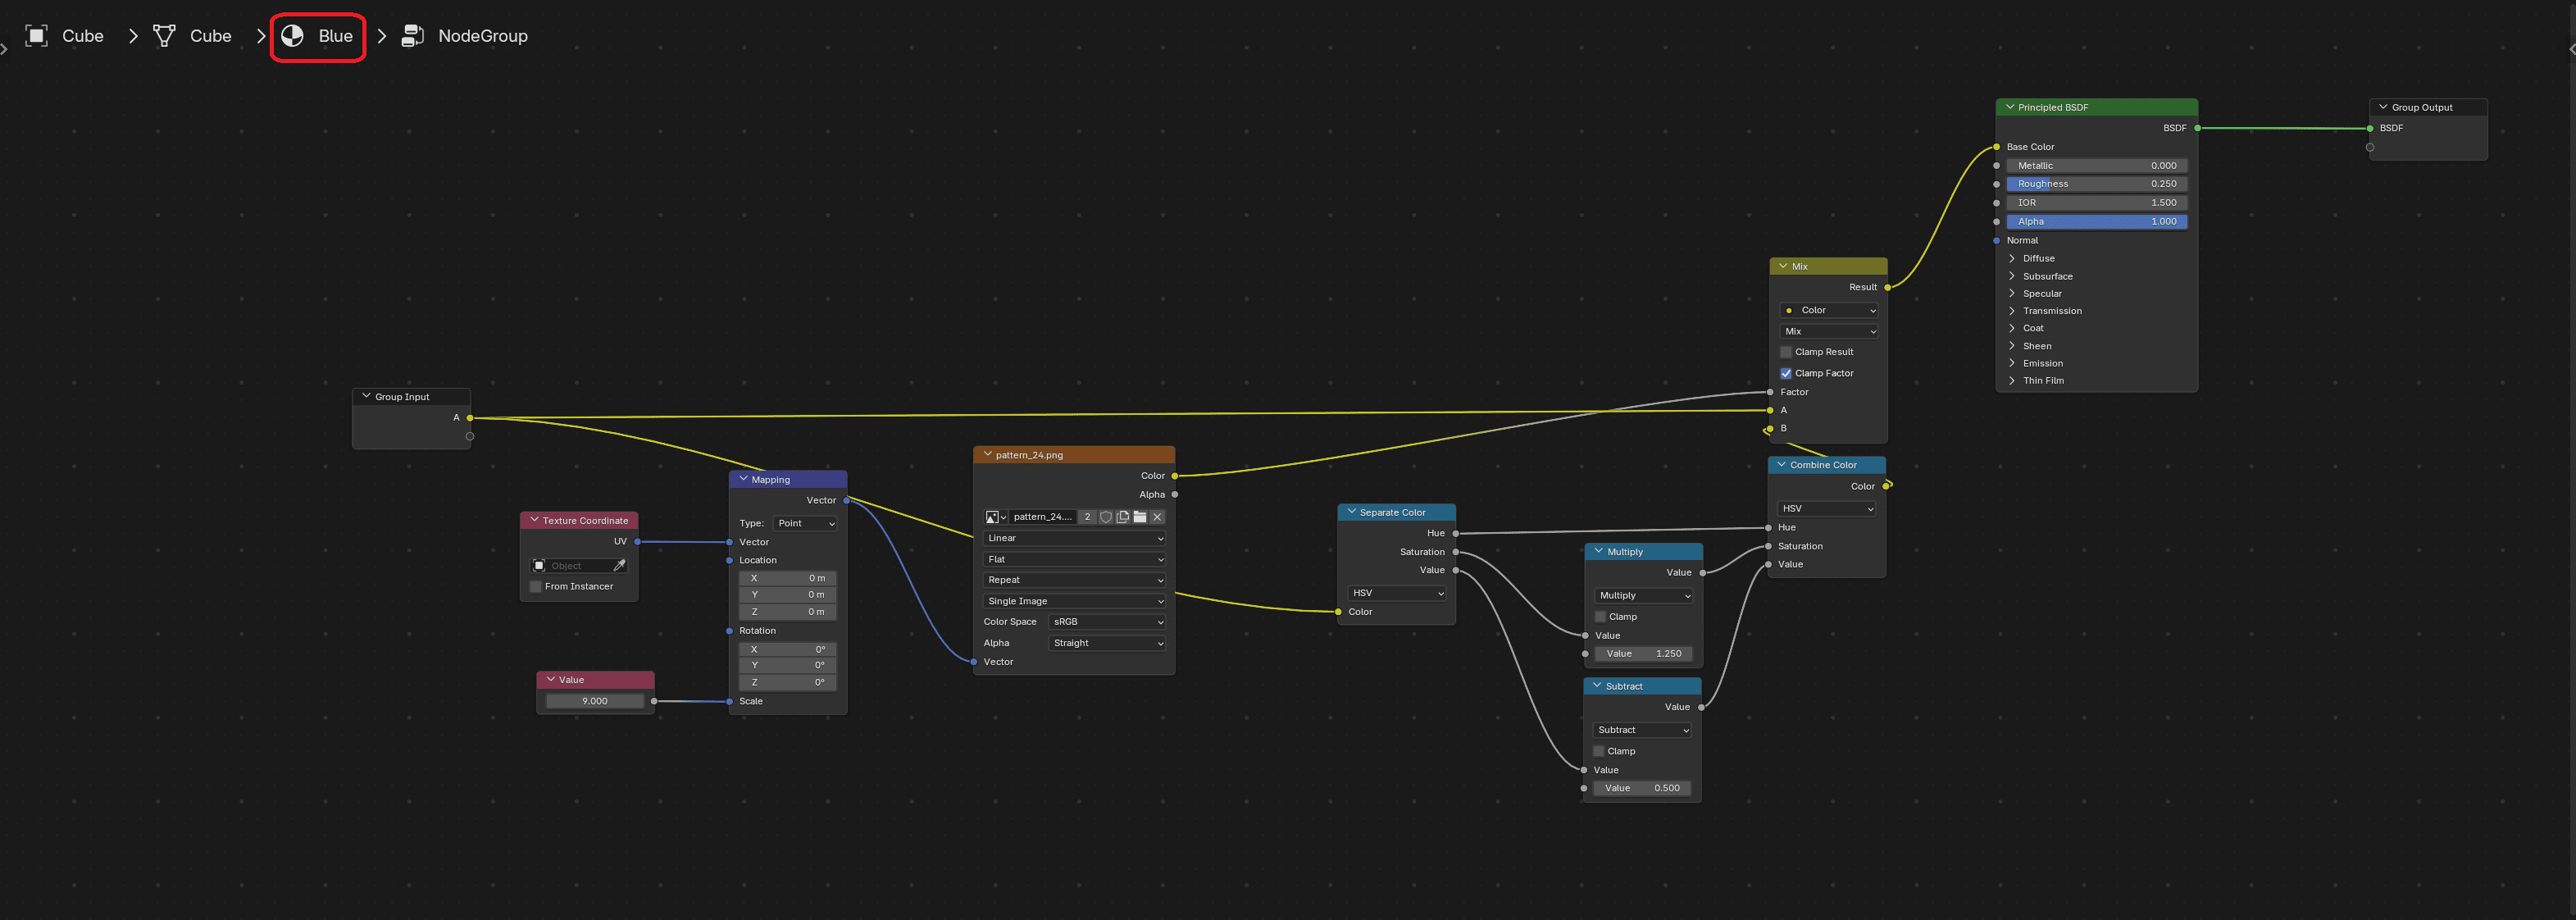
Now, you can copy and paste this pair of nodes into each Easter egg material, matching them with their respective colors.
You can rename your NodeGroup in the Node Properties window
How can I randomize the "RandomPattern"?
This part of the challenge is for you to solve on your own. You have the knowledge of all the necessary nodes and the power of the internet to do your own research. You've got this!
Scroll down really hard for the answer

The Answer