LVL 4
- Paint the egg
- Merge UI windows
- Draw on the egg
The egg must be white!
Well, it's actually already white if you turn on colors in the top-right corner under the Viewport Shading settings.
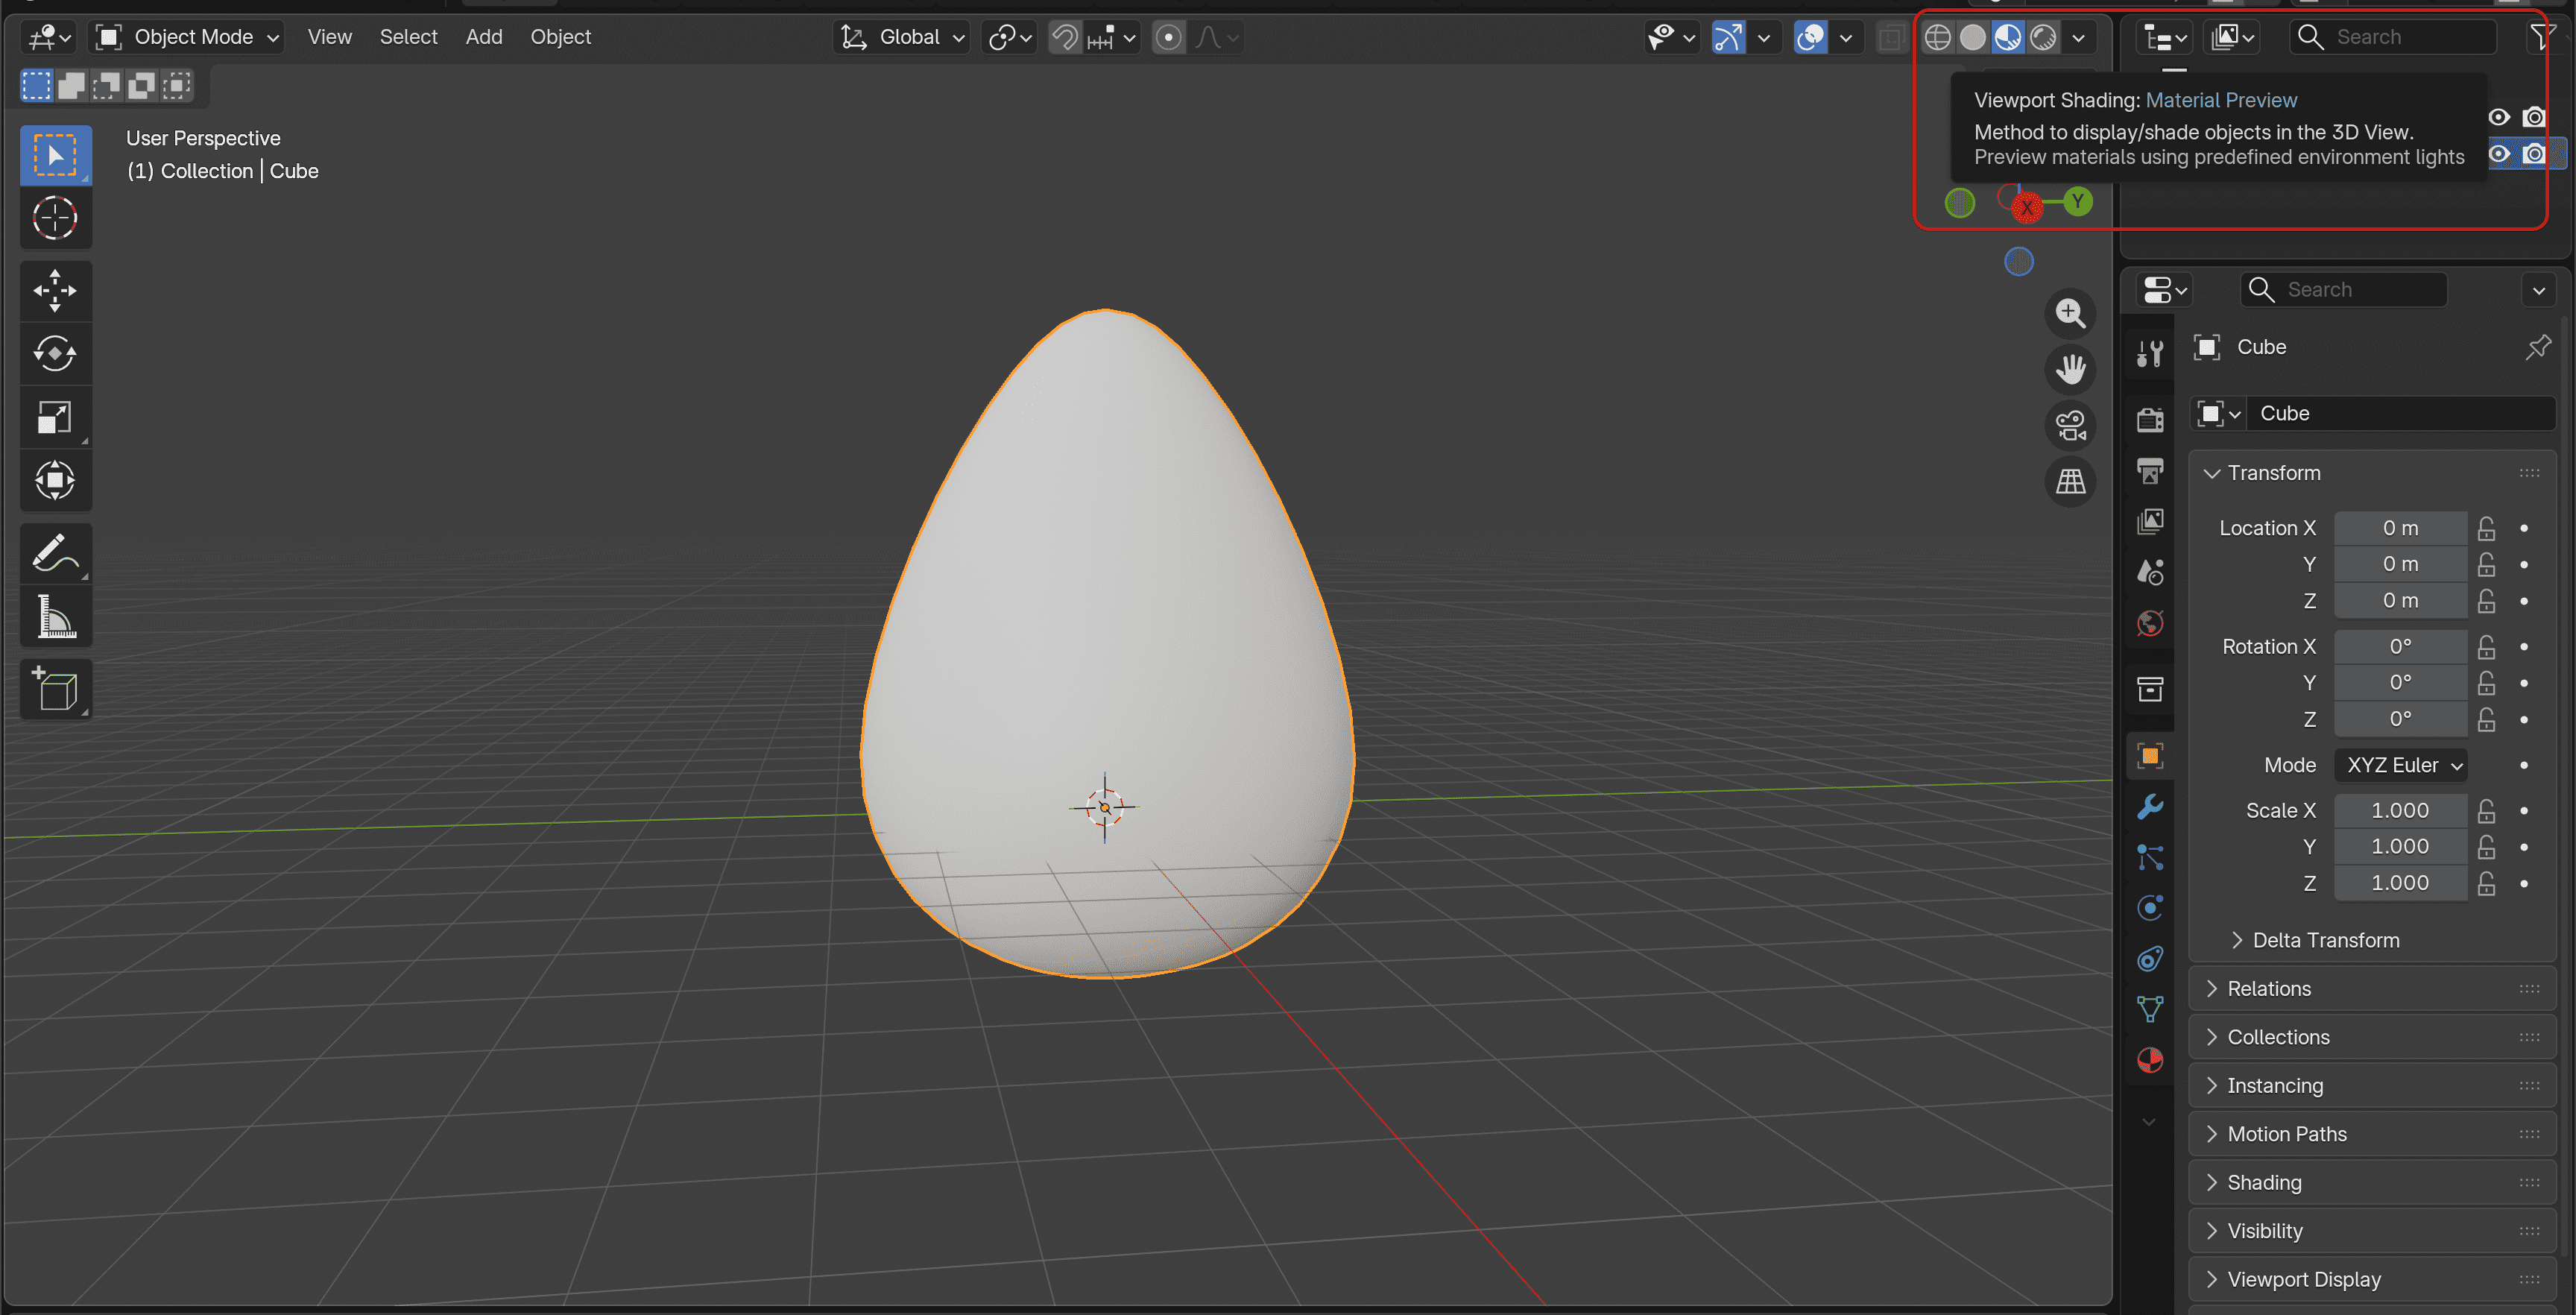
But why is it already white?
In fact, what you see is a predefined Material (the abstraction that defines the shading of the object) with its color set to white. In order to see its properties, we need to go to the Shading tab.
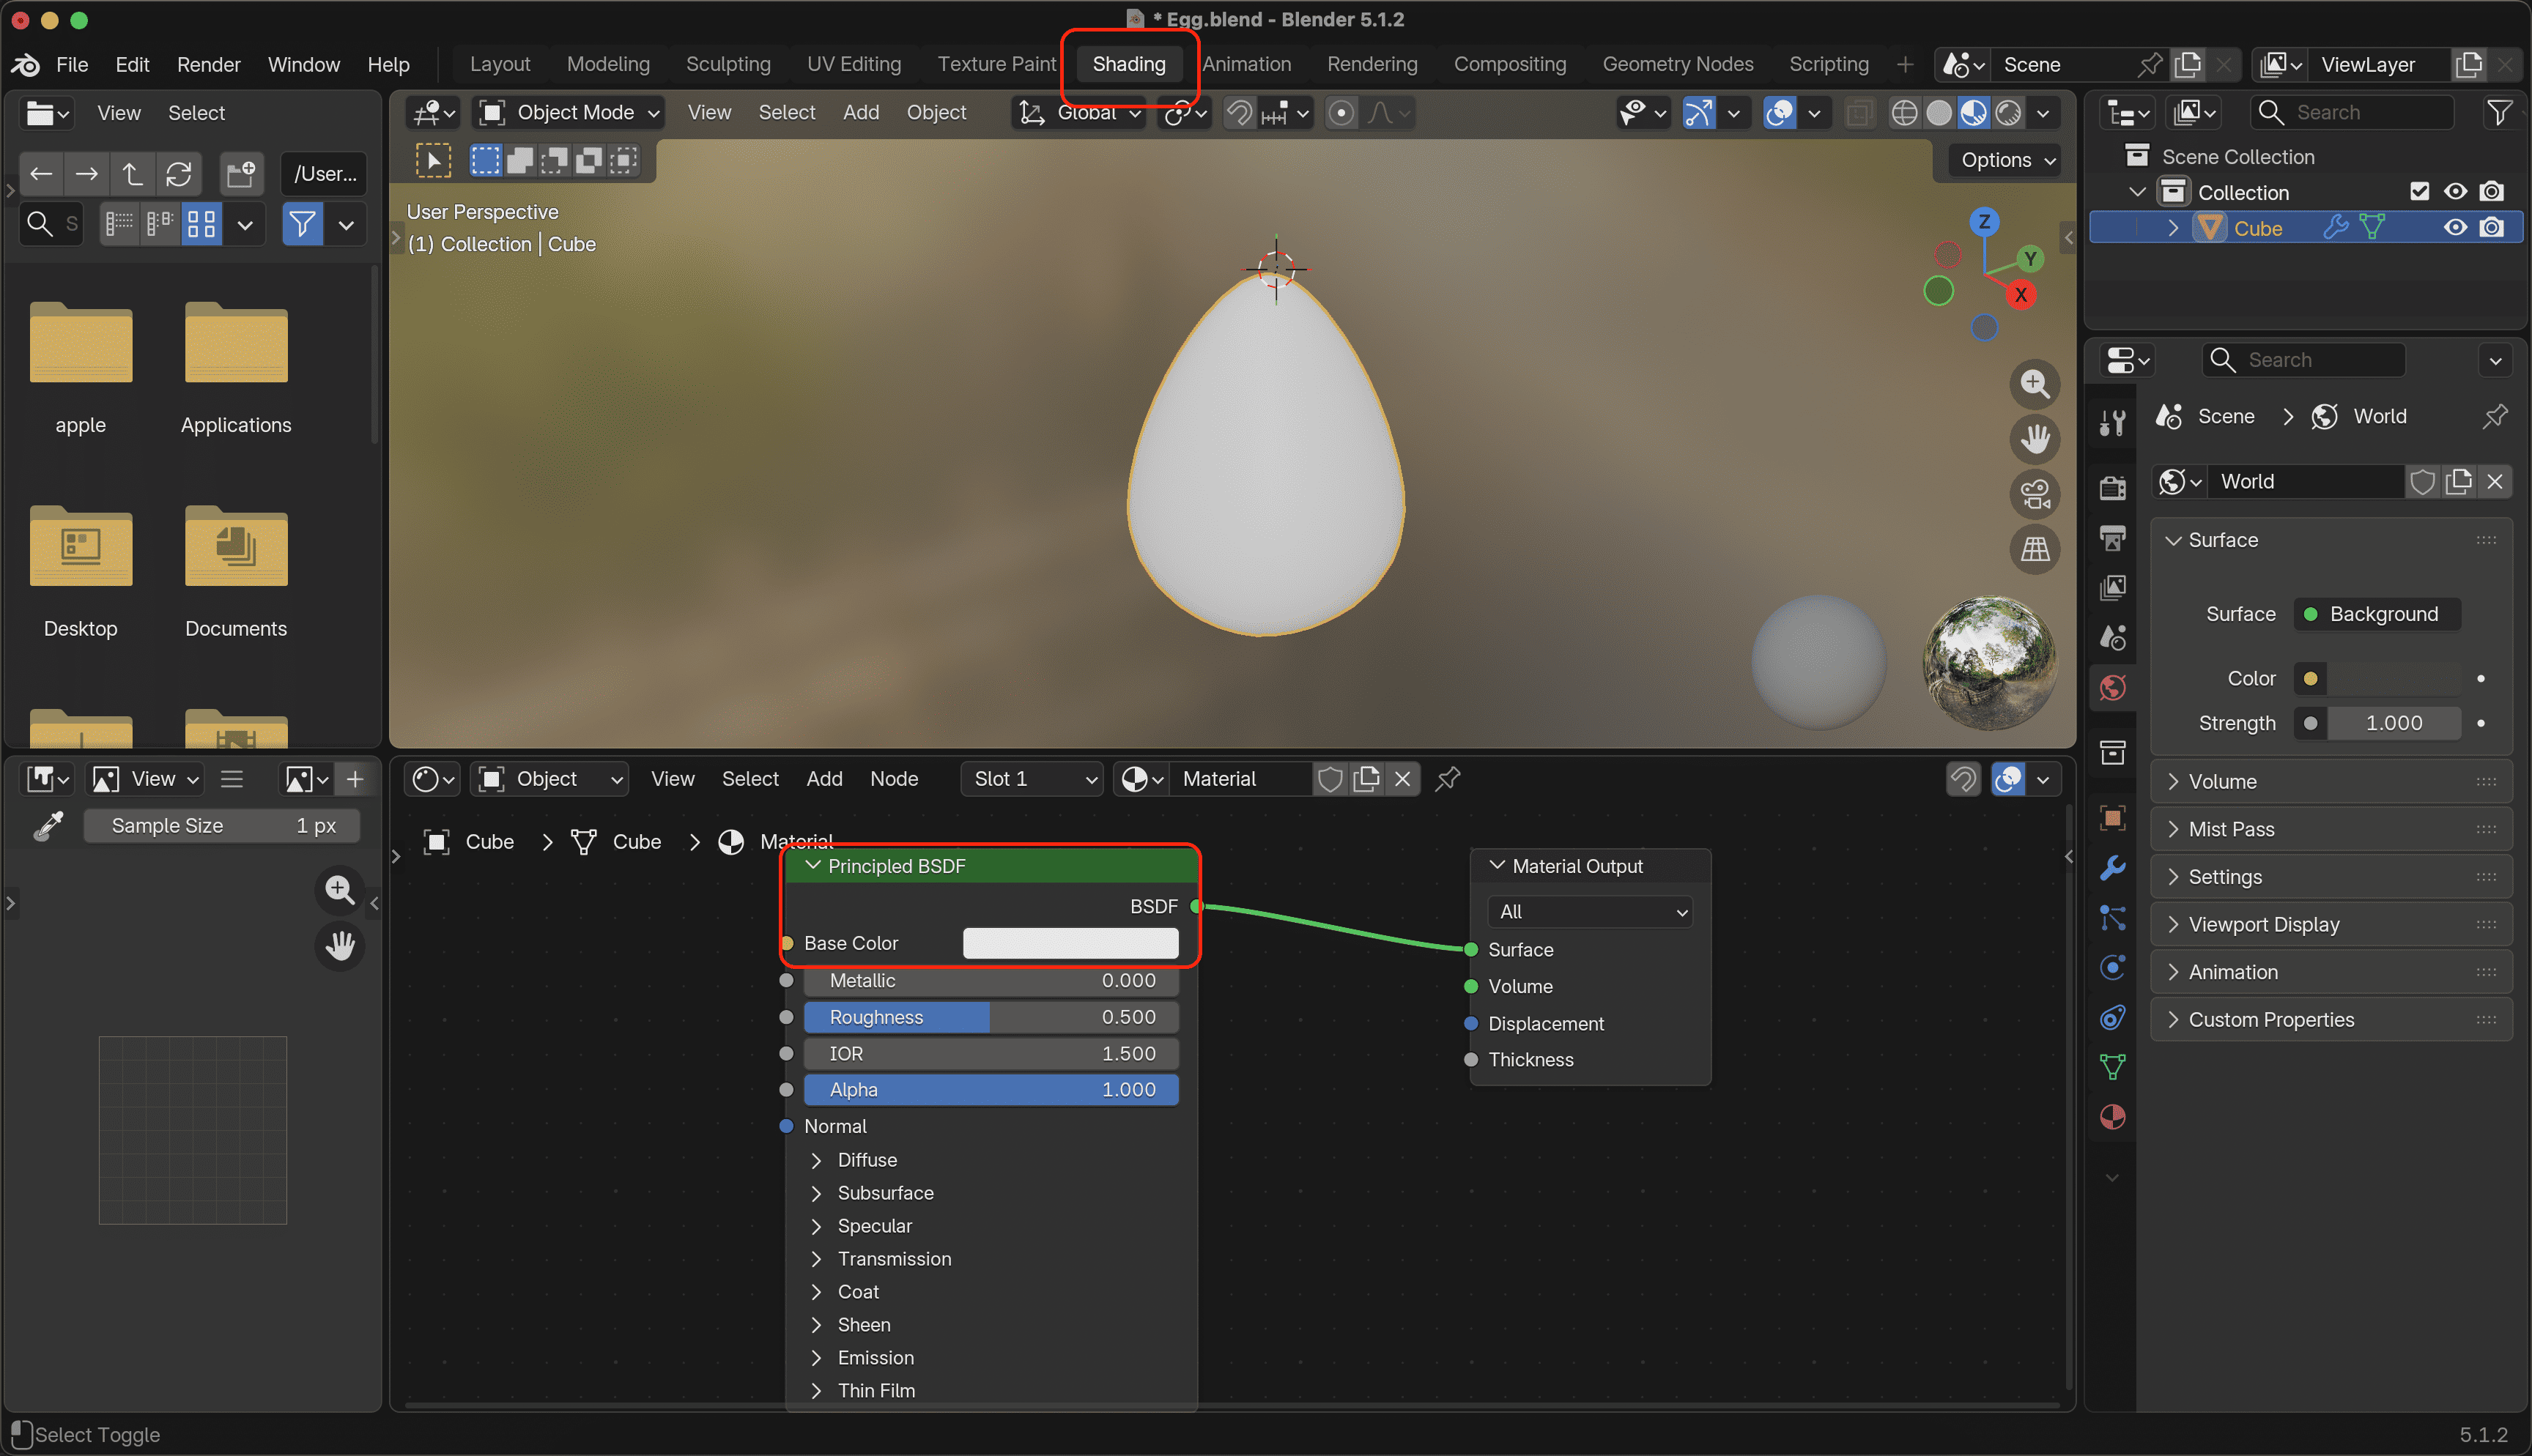 Click on the white color block to open the palette, which allows you to change the color of the entire egg
There are too many windows
For unknown reasons, Blender opens a lot of secondary windows that do not serve an immediate purpose. Fortunately, we can close them by joining those viewports into our main windows.
 Right-click on the edge between two windows
 Join Left to hide the File Browser
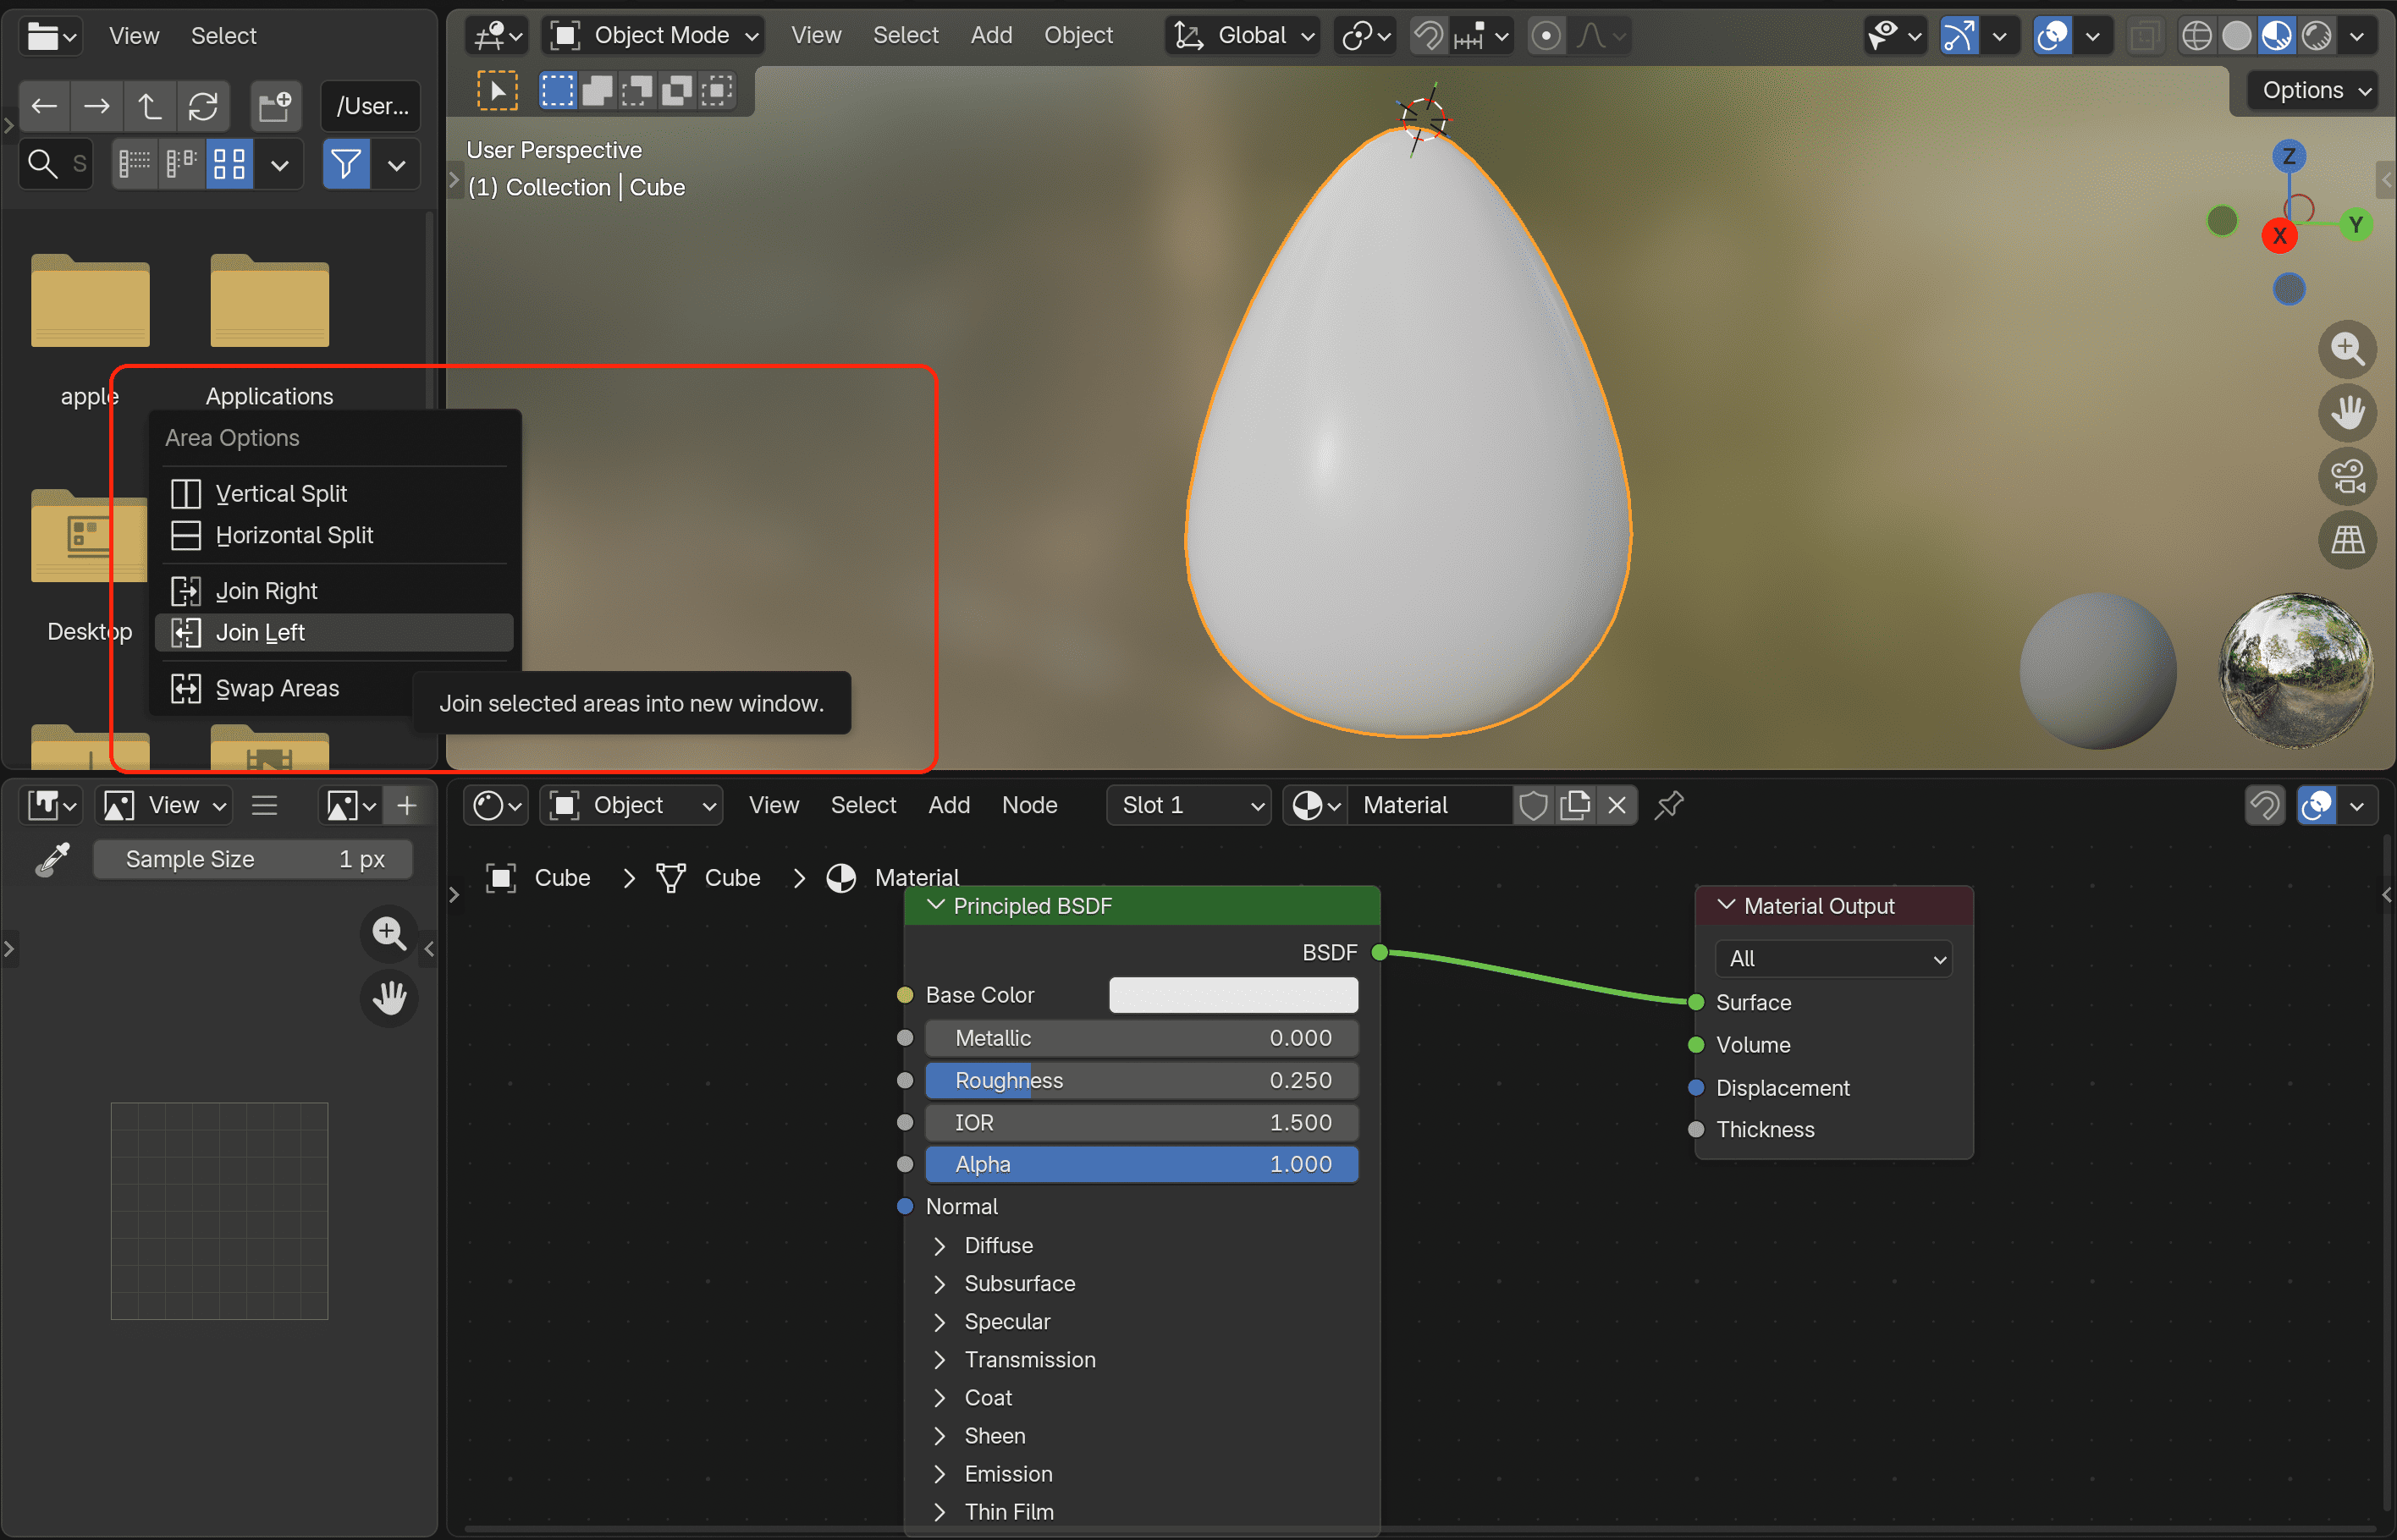 Repeat the same combo for the lower pair of windows
You"ve probably noticed that I"ve also changed the Roughness setting to 0.25 so the egg is more glossy. Eggs are not rough naturally, so be sure to repeat this step on your side as well!
The egg is perfect — and that's a problem
The big mental struggle for a 3D artist is sculpting something perfectly, only to crap all over it later. The reason for that is that almost nothing is truly perfect in nature: asymmetry, minor details, and other imperfect variations are required for a model to look alive in the human eye.
To keep things simple for now, we are going to draw a smiley face on the egg, just like a kid would.
Let's set up the canvas
To do that, we need to switch tabs again and head over to Texture Paint. Next, to allow drawing on the object's surface, Blender requires us to explicitly add a texture (Paint Slot) by clicking the "plus" button under Texture Slots.
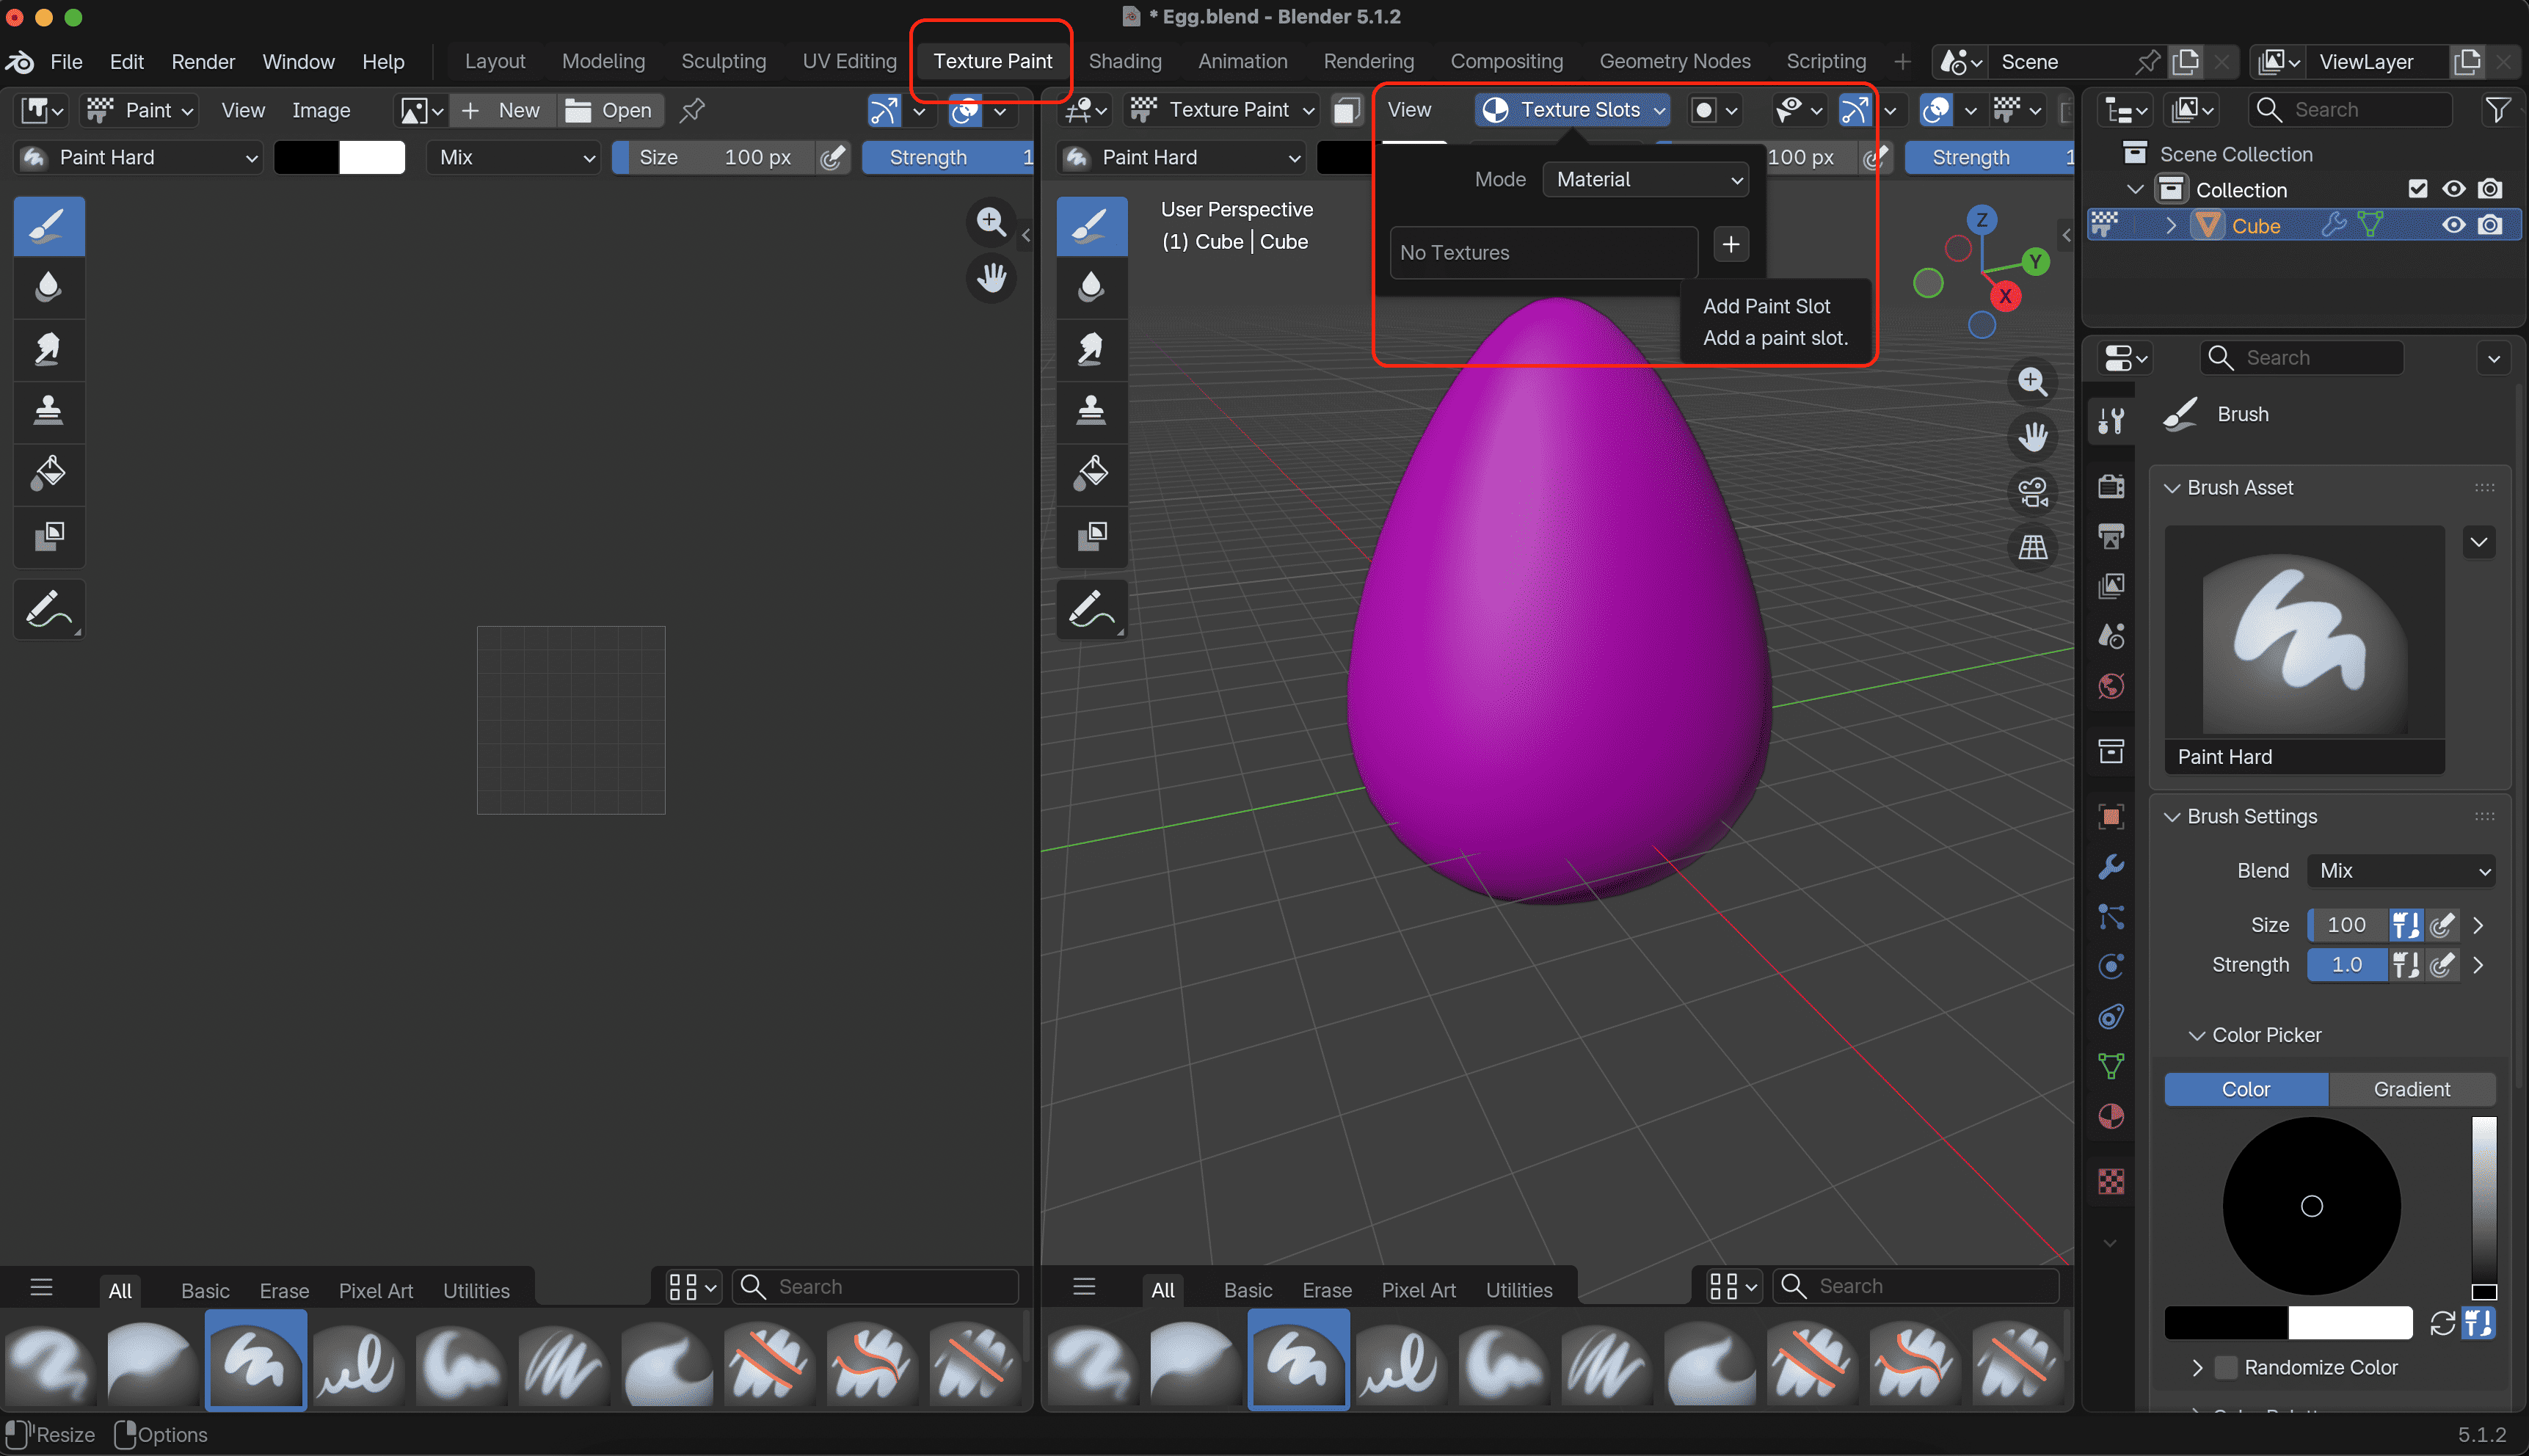
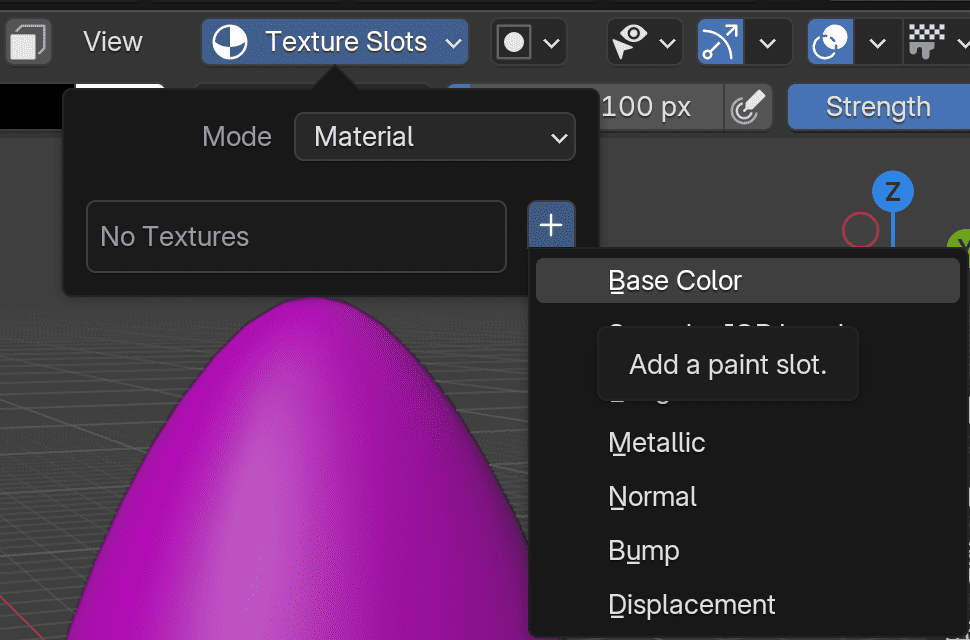
First, you need to select the correct texture (Base Color) to add, so Blender can link our newly created canvas to the egg's Material.
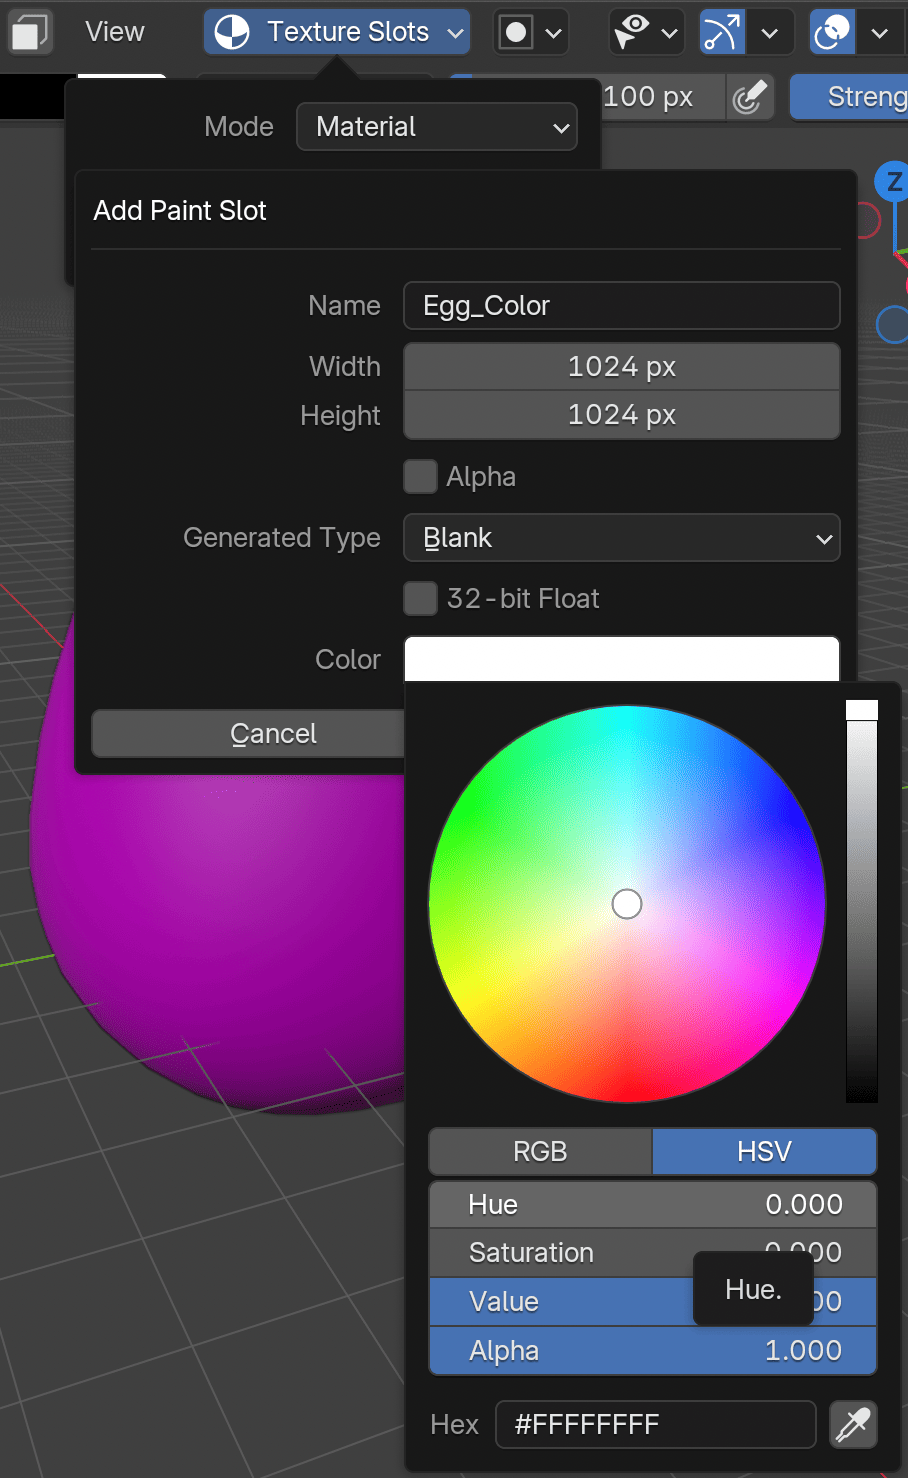
Secondly, it's important to configure the texture correctly: keep the 1024px resolution for this study, turn off the Alpha channel since we don"t need transparency for the egg, and make sure the color is set to white (#FFF), just as we established at the start of the lesson.
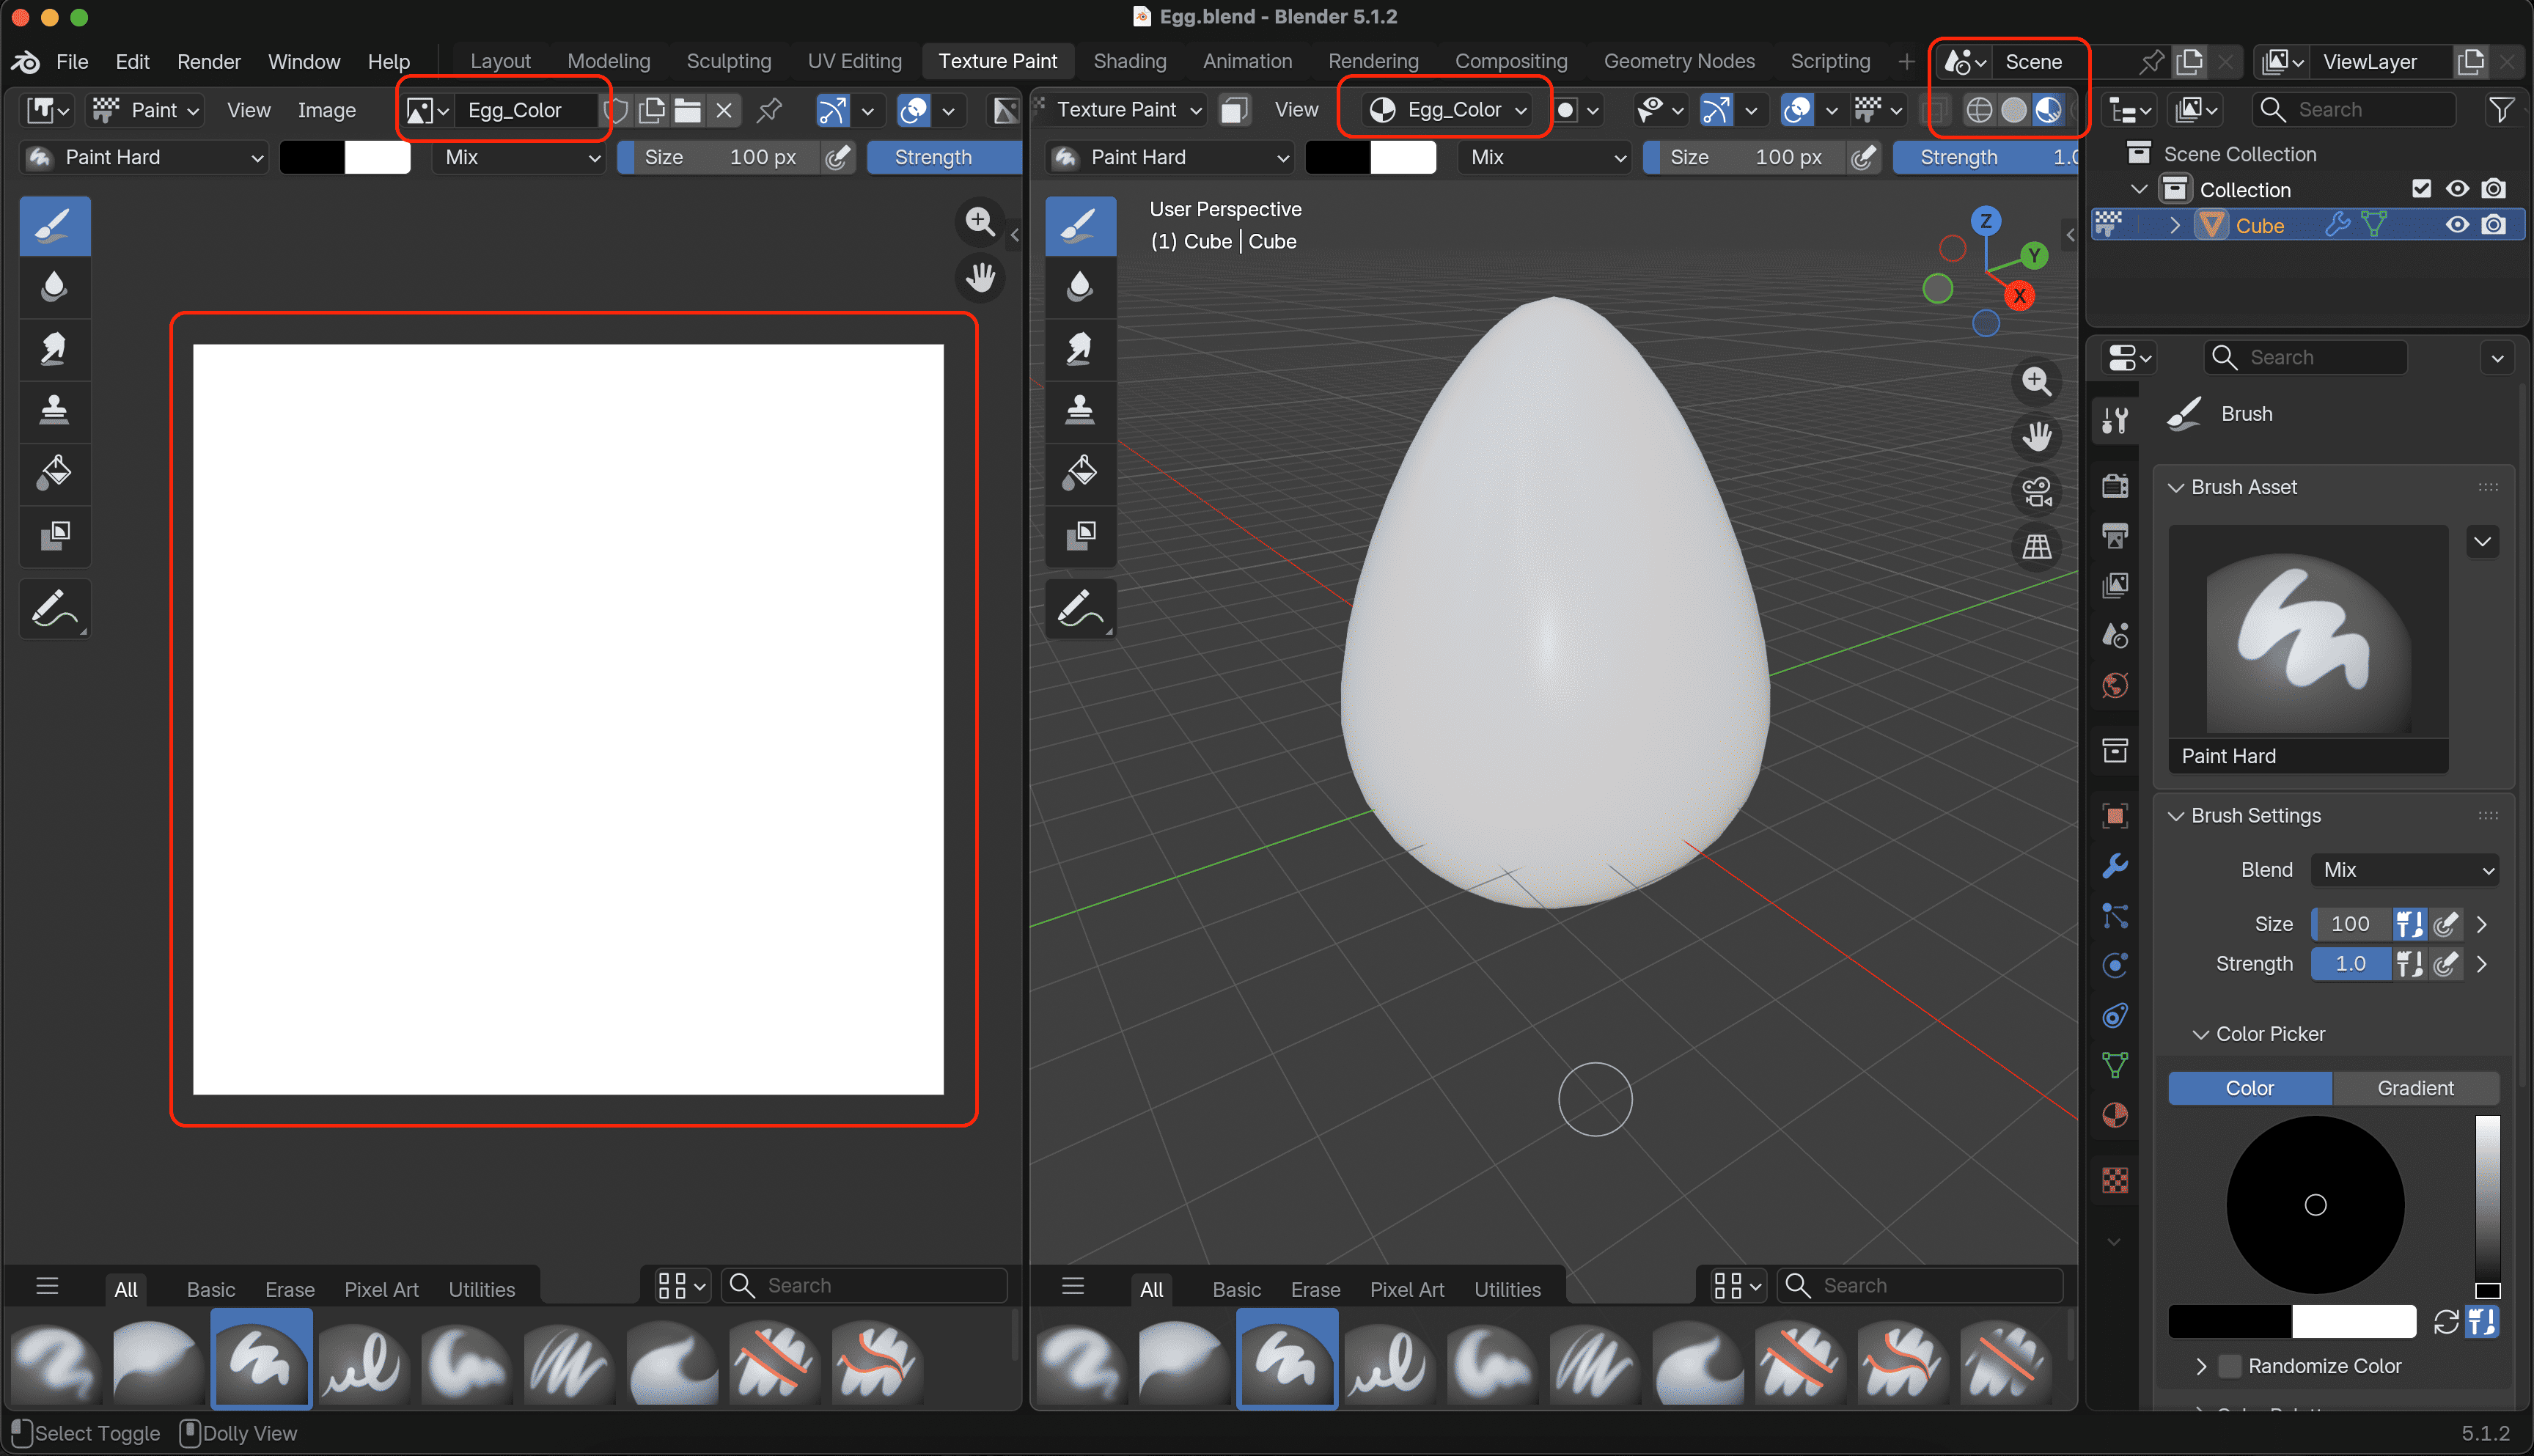
In the end, you will see your texture — under the name you gave it — in both the 2D and 3D views.
Draw-Draw-Draw
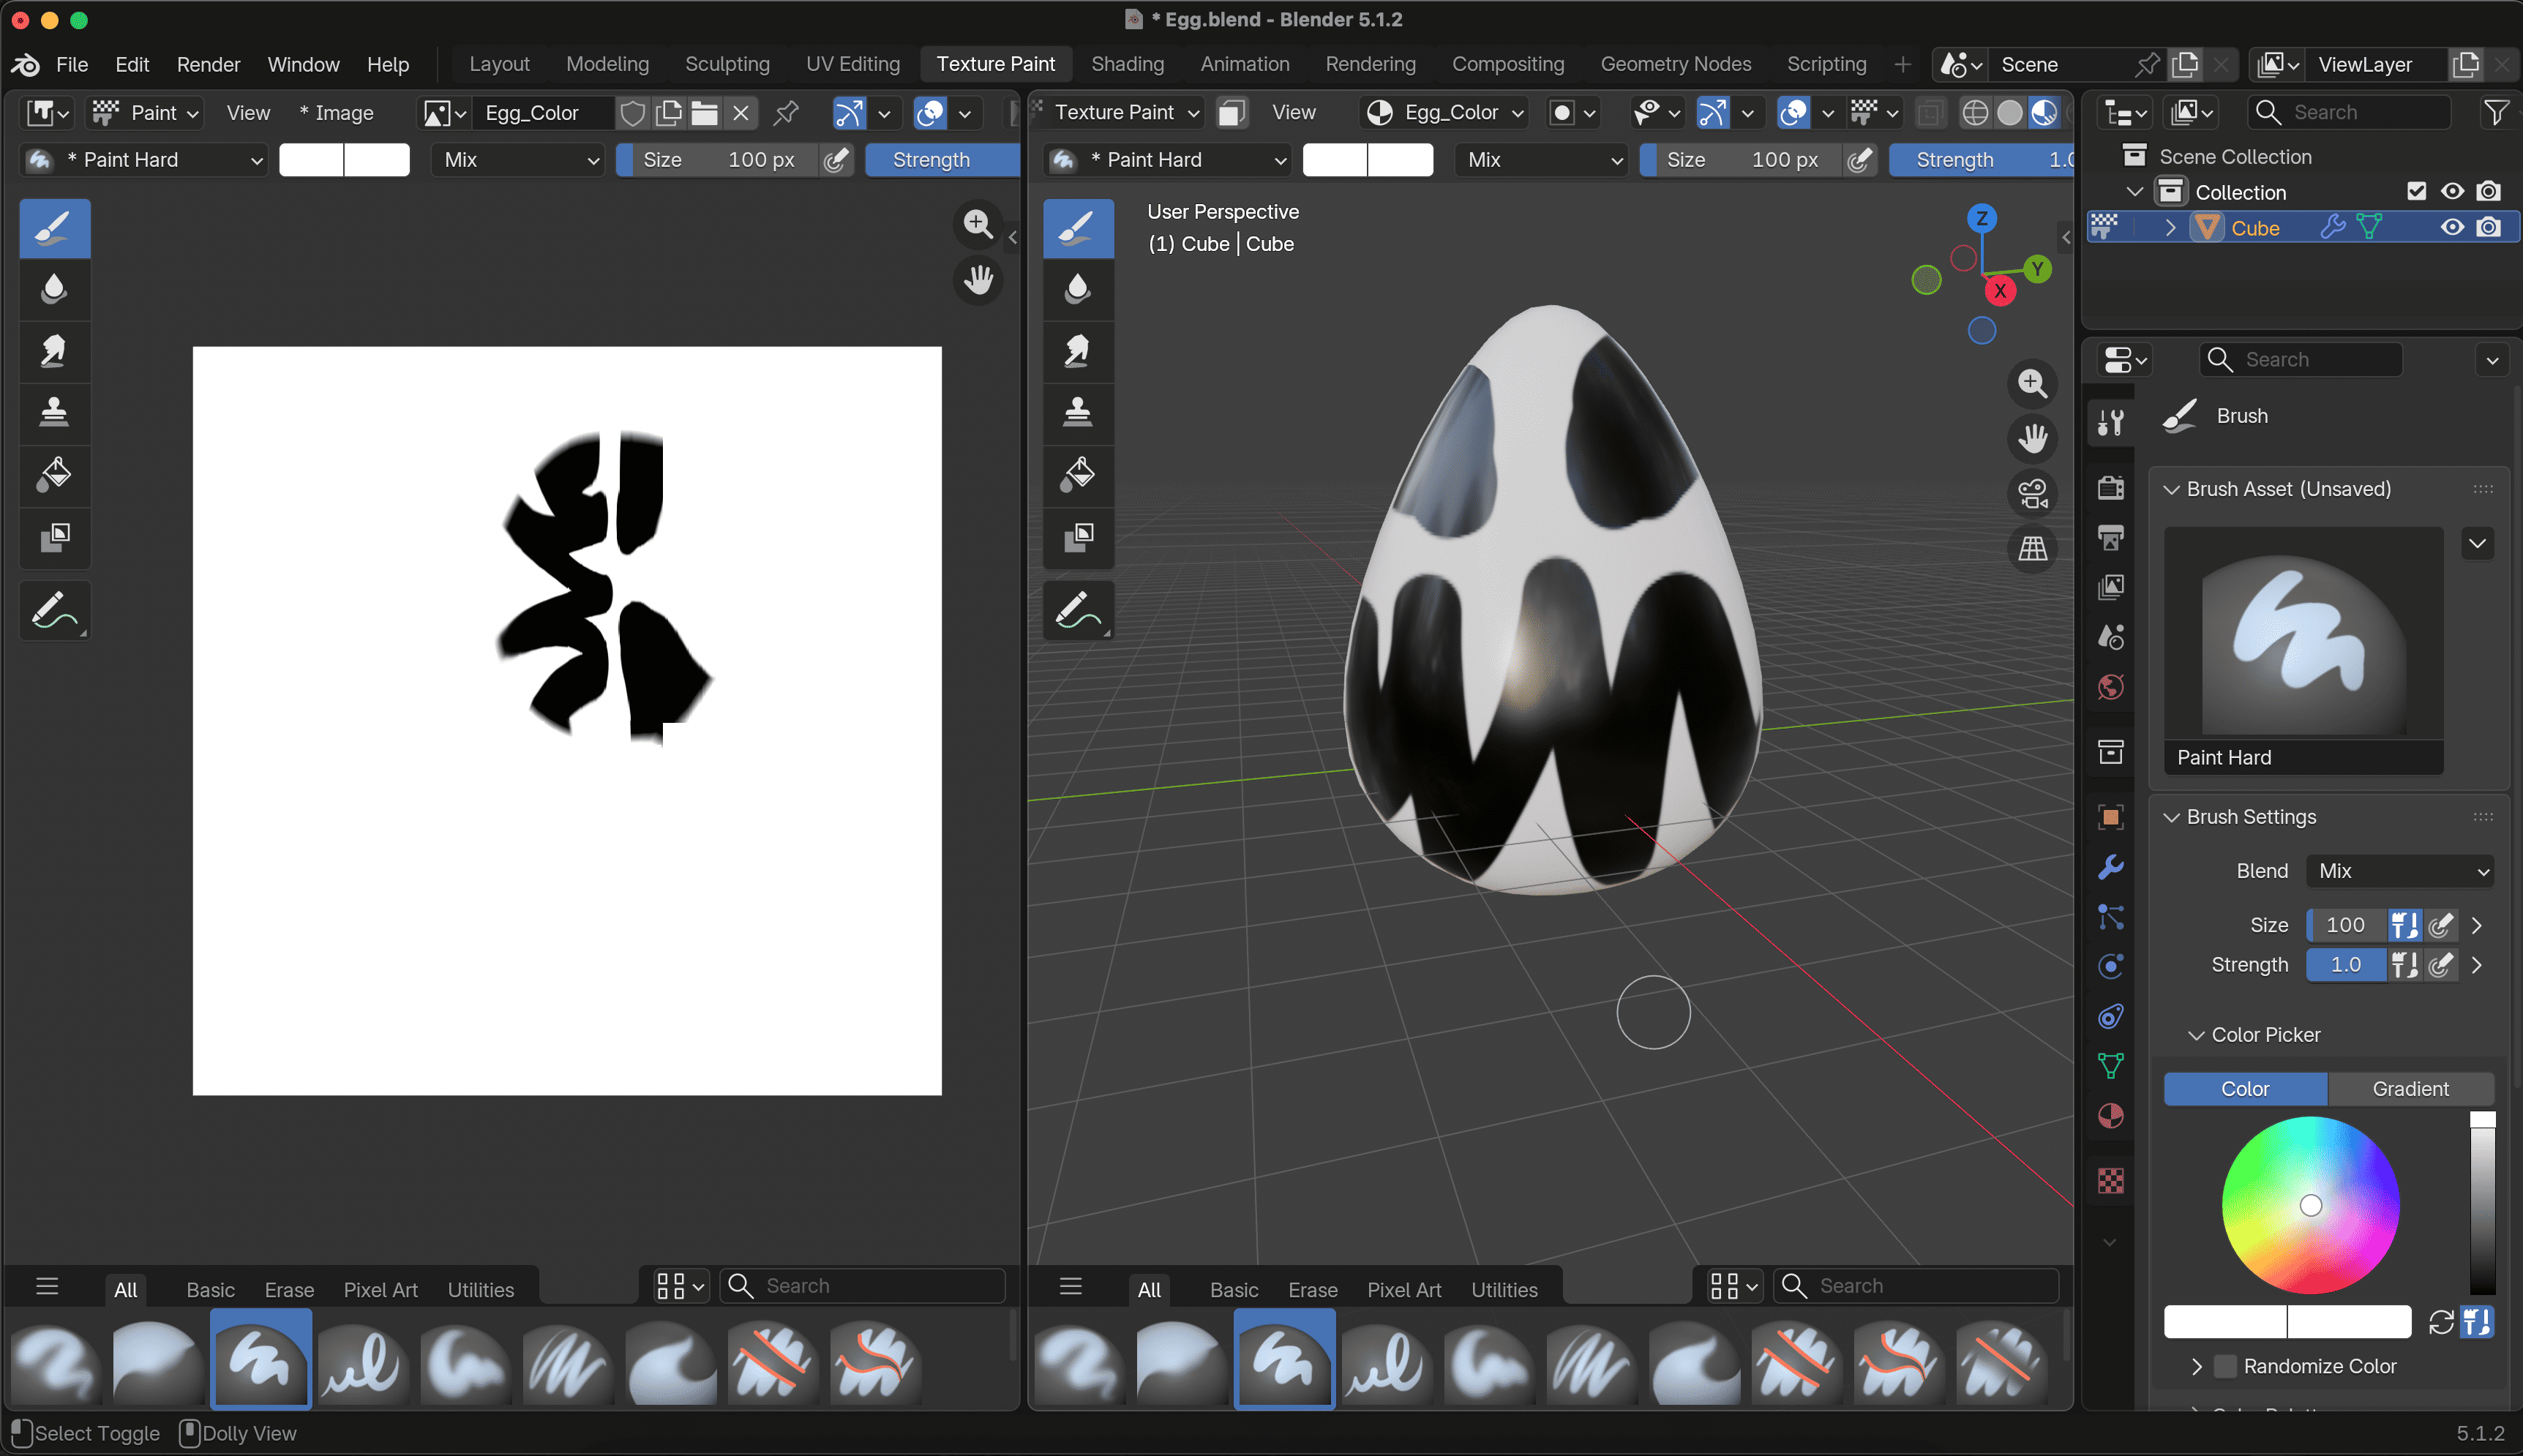
Now you"re free to draw whatever you like on the egg. I turned mine into Venom!
Click and hold to paint Drag to draw lines